
In 2024, How to Use Google Assistant on Your Lock Screen Of Vivo X100 Phone
How to Use Google Assistant on Your Lock Screen Of Vivo X100 Phone
Android has undergone numerous changes to enhance user experience and security. One notable feature that was once present was the ability to unlock phones with voice Google Assistant. However, Google Assistant has removed this feature across all versions since 2021.
While this voice-unlocking feature is no longer available, there are still many things you can do with Google Assistant, even when the Vivo X100 device is locked. This tool brings an added layer of convenience to your smartphone experience.
Let’s dig deeper into how you can use Google Assistant on the lock screen and make the most out of this tool in the following article.
 ## Part 1. What You Can Do With Voice Google Assistant
Google Assistant is a virtual assistant powered by artificial intelligence (AI) developed by tech giant Google. This application is readily available on most recent mobile phone models, especially those operating on Android 6.0 and newer versions.
Although you can no longer use the Google Assistant unlock feature, you can still perform a myriad of tasks using Google Assistant. These include:
- Getting the weather
- Setting alarms
- Playing music
- Sending texts
- Making a call
- Asking Google for information, etc.
Now that you’re eager to try the potential of Google Assistant on your lock screen, let’s walk through the simple steps on how to enable this tool.
- Step 1: Open Google Assistant:
Look for “Google Assistant” and open the app.
- Step 2: Ask Google Assistant to open the settings.
You can ask, “Hey Google, open the Google Assistant settings,” and it will show you the Google Assistant settings.
- Step 3: Allow Google Assistant on the lock screen.
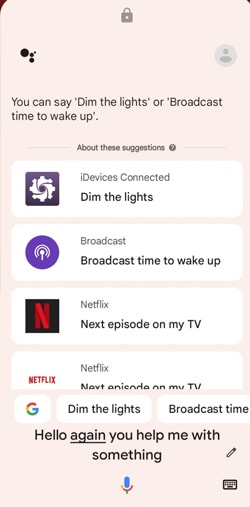
Locate the “Lock Screen” settings and make sure to switch on “Assistant responses on lock screen.”

After you’ve successfully enabled Google Assistant on your lock screen, let’s see how to use Google Assistant to do certain tasks more efficiently and hands-free.
- Step 1: Wake Up Google Assistant
Start by waking up Google Assistant. You can do this by saying the wake word “Hey Google” or “OK Google.” If it doesn’t work, you can long-press the home button or use any dedicated gesture to activate Google Assistant.
- Step 2: Issue a Voice Command
Once Google Assistant is active, issue a voice command related to the task you want to perform. For example:
“Hey Google, what’s the weather today?”
“OK Google, set an alarm for 5 PM.”
“Hey Google, play my Spotify playlist.”
When you can still unlock with Google Assistant, you can ask it to “unlock my phone” or use any similar command.
- Step 3: Interact with Responses
Google Assistant will then provide spoken responses and display relevant information on the lock screen. For instance, if you ask for the weather, it might verbally provide the current conditions and display a brief summary on your lock screen.

Unable to use Google Assistant to unlock phone is not the only drawback that users may have encountered in recent changes. Although Google Assistant on the lock screen presents a revolutionary way to interact with your phone, like any technology, it also comes with its share of challenges. Some of the common problems when using Google Assistant are:
- Misunderstandings and misinterpretations
One prevalent issue users encounter is Google Assistant misunderstanding or misinterpreting voice commands. This can be influenced by factors such as background noise, accent variations, or pronunciation differences.
- Limited context understanding
While Google Assistant is adept at understanding individual commands, it may struggle with complex, multi-step requests that rely heavily on context. Break down your tasks into simpler commands to enhance comprehension and execute it more accurately.
- Inability to execute certain tasks
Google Assistant’s capabilities are extensive, but there are instances where it may struggle to execute specific tasks. For example, it can’t execute tasks that involve interacting with certain third-party applications or services. You can’t also unlock phone with voice Google Assistant.
Tips to Make Voice Google Assistant Recognize Your Commands
One of the most infuriating problems with voice Google Assistant is that users often encounter difficulties in having their commands accurately recognized. To enhance the accuracy of voice recognition with Google Assistant, you can consider implementing the following tips:
- Speak Clearly and Naturally
Make sure that you speak in a clear and natural manner. Avoid mumbling or speaking too quickly. Enunciate your words, giving Google Assistant a better chance to interpret your commands accurately.
- Use Simple and Direct Phrases
Keep your commands simple and direct. Avoid unnecessary elaboration or complex sentence structures. Google Assistant is more likely to understand straightforward commands.
- Check Your Microphone
Ensure that your device’s microphone is in good working condition. Dirt or debris on your phone’s microphone can affect its performance. Clean the microphone area and try again.
- Quiet Environment
Background noise can interfere with voice recognition. Try to issue commands in a quiet environment to minimize any potential confusion caused by external sounds.
Now, you know that you can’t unlock phone via Google Assistant anymore. But what if you accidentally forget your phone’s passcode? Is there a reliable method to regain access to your Android device without the passcode?
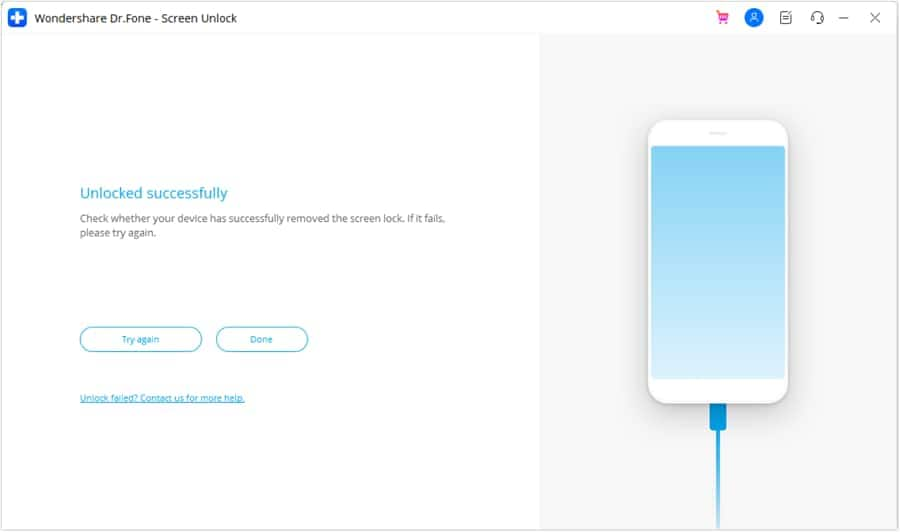
Fortunately, Wondershare Dr.Fone offers a straightforward solution for precisely such scenarios. It provides a simple and effective way to unlock your Android phone screen through Dr.Fone - Screen Unlock when the screen lock is forgotten or becomes inaccessible.
![]()
Dr.Fone - Screen Unlock (Android)
The Best UnlockJunky Alternative to Solve Your Screen Locks
- Completely unlinked from the previous Google account, it won’t be traced or blocked by it anymore.
- Remove all Android screen locks (PIN/pattern/fingerprints/face ID) in minutes.
- Compatiable with various Android models.
- Provide specific removal solutions to promise good success rate.
4,008,670 people have downloaded it
If you are wondering how to unlock your Android phone screen without a passcode with Dr.Fone – Screen Unlock, follow the steps below.
- Step 1: Launch the Screen Unlock Tool
Open the latest version of Wondershare Dr.Fone on your computer and connect your phone device using a USB cable. Once connected, navigate to the Toolbox > Screen Unlock to access Dr.Fone – Screen Unlock tool.

- Step 2: Select Android for your device type.
As the Dr.Fone Screen Unlock tool supports both Android and iOS, you will need to indicate the specific device you are using. Opt for the Android option if you are unlocking an Android device. Then, continue to choose “Unlock Android Screen” on the next screen.

- Step 3: Remove Screen Lock Without Data Loss
- In this step, you will be directed to select your device brand. Choose the Android device brand you are using and opt for “Remove without Data Loss” if you don’t want to lose your data.

- Step 4: Define Device Details
Next, make sure to check and confirm the Brand, Device Name, and Device Model to unlock your Android screen. Tick the checkmark that says you agree with the warning and are ready to proceed. Click “Next” to unlock your screen.

Type “000000” continue by clicking Confirm.

- Step 6: Put Android in Download Mode
Dr.Fone will then guide you to put your Android device into Download Mode according to the model you have identified. After you have followed the instructions, Dr.Fone will automatically lead to the next screen to proceed the unlocking process.

You May Also Interested:
Unlocking Your Realme Phone Made Easy: Step-by-Step Guide
8 Safe and Effective Methods to Unlock Your iPhone Without a Passcode
Complete Guide to Unlock Mi Account Without Password In 2024
Conclusion
Google Assistant is a versatile virtual assistant that is designed to help you with a wide range of tasks and make your daily life more convenient. Accessible on most modern Android devices, it enables users to perform several tasks through voice commands.
However, if you are looking for ways to unlock phone with Google Assistant, this function is no longer available. Google Assistant unlock feature has been discontinued since 2021. But in case you’ve forgotten the screen lock passcode, you can use Wondershare Dr.Fone Screen Unlock tool to regain access to your Android phone. This tool facilitates the unlocking process without data loss, featuring a user-friendly learning curve.
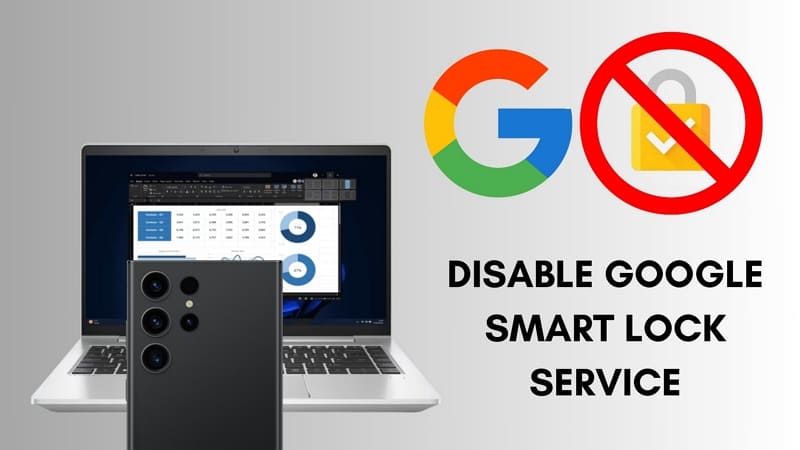
Google services are pivotal in enhancing user experience and securing personal data. Among these services, Google Smart Lock stands out for its ingenious features. These are integrated into Android devices, simplifying access and bolstering security. However, there are instances where users seek to disable or remove Google Smart Lock.
This article goes through the details of Google Smart Lock and its significance. It offers a solution to address unexpected screen lock scenarios on Android devices.
Want to know what is Google Smart Lock? Google Smart Lock serves as a multi-purpose tool within the Google ecosystem. It is designed to streamline security measures and password management access across platforms. At its core, Google Smart Lock operates as a feature that manages passwords. Google Smart Lock aims to enhance authentication processes. Primarily, it operates across Android devices and computers.
It offers a unified approach to security, ensuring you don’t have to remember all the passwords. Google Smart Lock securely stores and manages passwords for websites and apps. It enables users to access these services without repeatedly entering login details. When you visit a familiar website or app, Google Smart Lock fills in the login credentials. It automatically provides the login ID and password, maintaining effortless access.
Part 2. Recognizing Some Top Features of Google Smart Lock
Google Smart Lock’s password management has revolutionized how users handle and secure their login credentials. It remains a cornerstone when handling Android devices and computer systems. The following are several notable features that significantly enhance user convenience and security:
Google Smart Lock simplifies the login process across apps and websites. It does that by automatically filling in saved credentials. This eliminates the need for users to remember and manually input passwords.
It synchronizes saved passwords across multiple devices using the same Google account. This ensures smooth access to credentials on Android devices and computers.
3. Secure Storage
Passwords stored within Google Smart Lock are encrypted and securely stored in the user’s Google account. This maintains confidentiality and safeguards sensitive login information.
4. Effortless Password Generation
It allows the creation of strong and unique passwords when signing up for new accounts. That enhances overall account security and allows users to have strong passwords.
These features significantly ease the burden of password management and enhance user security. Yet, Google Smart Lock does have limitations that prompt some users to consider removing it.
Part 3. Why Is It Essential To Remove Google Smart Lock?
Despite its array of benefits, there are times when users consider removing or disabling Google Smart Lock. Described below are these limitations to better grasp why users might choose to Google Smart Lock turn off:
1. Privacy Concerns
Some users focus on privacy and feel uncomfortable with Google Smart Lock’s access to their passwords. The reason behind this is how easily anyone can access the saved password. All they need to do is access “Manage Passwords” in Google Chrome, and all their passwords will be open. This leads them to opt for more private password management options.
2. Glitches and Technical Issues
Technical glitches in the functioning of Google Smart Lock can be frustrating. This is especially prominent when managing passwords with similar usernames across different websites. The same can happen when using similar passwords for different websites or apps. Users experiencing such issues can seek to remove it to restore regular operations.
3. No Updates
You should be aware that Google Smart Lock for Passwords has been deprecated. This indicates it no longer receives updates or support from Google. Developers are advised to opt for Google’s One Tap Sign-in feature as an alternative by Google. It provides a more efficient and secure method for signing in to apps and websites.
4. Preference for Third-Party Tools
Certain users might have a preference for specialized third-party password management tools. They can go for solutions that offer a wider array of features. Many users might want to find options better aligned with their specific needs. This prompts them to disable Google Smart Lock.
If you want to disable Google Smart Lock on your devices, it is a relatively easy thing to do. Several ways are available to disable or remove Google Smart Lock from devices. These approaches cater to users’ diverse needs and preferences. Here is how to turn off Google Smart Lock:
### Way 1. Disabling Google Smart Lock on Your AndroidTo deactivate Google Smart Lock on your Android device, you can use Chrome. Google Chrome is the main hub for storing all your login credentials for websites and apps. This provides the quickest way to disable Google Smart Lock. To disable Google Smart Lock from the Chrome app on your Android device, follow these steps:
- Step 1. Begin by opening the Google Chrome app on your Android device. Then, tap the “three dots” icon from the top right corner and press “Settings.”


Google Smart Lock enables users to keep their phones unlocked under specific, pre-approved, and secure conditions. This simplifies device usage by eliminating the need to input passwords or security codes. The basic working of this aspect of Google Smart Lock, now known as “Extend Unlock,” is divided into three parts.
The first one is on-body detection, which keeps the Vivo X100 device unlocked when it’s carried or held by the user. The other two are “Trusted Places” and “Trusted Devices.” Users can set specific locations, like home or work, as “Trusted Places.” When the Vivo X100 device is within these locations, it remains unlocked and accessible. Smart Lock integrates biometric authentication methods to unlock devices.
As helpful as it is in managing access to your Android device, privacy concerns can cause users to disable this lock. The following are the steps you can take to disable Google Smart Lock/Extend Unlock via Android settings:
- Step 1. Access “Settings” on your Android device and scroll down to tap “Passwords & security.” Here, press the option labeled as “Privacy.”
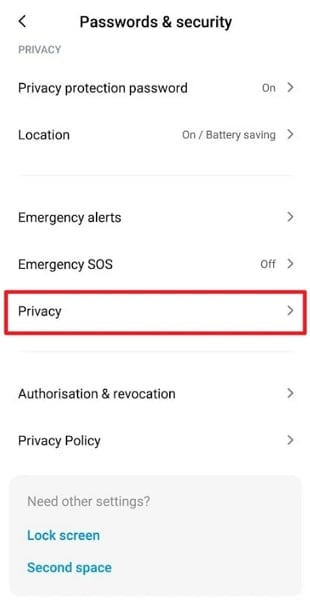
- Step 2. On the following screen, head to the “Trust agents” option and toggle off the “Smart Lock (Google)” option to disable the feature on your device.

Way 3. Disabling Google Smart Lock From Chrome
While you can manage this feature on Android devices, it is also available on Google Chrome on your computer. To disable Google Smart Lock from Google Chrome on your computer or laptop, you can follow these steps:
- Step 1. On your computer, access Google Chrome and click the “three dots” near the top right corner. From the context menu, choose “Settings” and tap “Autofill and passwords” from the left side.

- Step 2. Now, click “Google Password Manager” on the ensuing window, and choose “Settings” from the left side. Toggle off “Offer to save passwords” and “Sign in automatically” to disable Google Smart Lock.

Disabling the Google Smart Lock can have a side effect, which is the danger of forgetting an important password. One of these important passwords is the screen lock on your Android device. These scenarios could involve forgetting the Vivo X100 device’s PIN, pattern, or password. This could be essential for unlocking the phone or accessing its functionalities. It can lead to being locked out of the Vivo X100 device, hindering normal operations.
In such instances, regaining access becomes crucial. Wondershare Dr.Fone offers a robust solution in these cases. This software specializes in unlocking Android devices when users forget their device passcodes. It offers a swift solution to eliminate Android lock screens within 5 minutes. If you own a Samsung or LG device, you can unlock it without data loss.
Notable Features of Wondershare Dr.Fone
- This tool bypasses the Android FRP lock without necessitating a PIN or Google account.
- It broadens its ability to unlock well-known Android brands like Samsung, Huawei, and LG.
- Additionally, its intuitive interface guarantees that no technical know-how is required.
Step-by-Step Guide To Unlock Android Smartphone via Wondershare Dr.Fone
Dr.Fone makes the process of unlocking an Android device a breeze. Here’s a step-by-step guide to recover an Android device using Wondershare Dr.Fone:
- Step 1. Unlocking an Android Device Using Wondershare Dr.Fone
To begin, install the most recent edition of Wondershare Dr.Fone and connect your Android device using a USB cable. Access the “Toolbox” menu and locate the “Screen Unlock” tool upon successful connection. Once opened, choose the “Android” option when prompted. Next, select “Unlock Android Screen” from the available options.
- Step 2. Device Brand Selection and Screen Unlock Initiation
Select your device brand and “100% Remove Screen Lock.” Selecting the Vivo X100 device brand initiates access to the designated mode. It will trigger Dr.Fone to commence unlocking the Android screen. Note that entering specific modes varies depending on the Vivo X100 device brand. Upon successfully unlocking your Android device screen, tap “Done.”
This comprehensive guide describes the significance of Google Smart Lock. It explains its features and various methods to disable it from Android devices and Chrome. Exploring scenarios of forgotten passcodes highlighted the critical need for a reliable solution. Wondershare Dr.Fone emerges as a savior in such situations. It offers a secure means to regain access when locked out of your device.
## Mastering Lock Screen Settings: How to Enable and Disable on Vivo X100In the modern world, the use of smartphones has become such a common trend that everyone would feel abnormal if they don’t have a smartphone of their own. So big the demand is that all IT companies are trying their best to introduce as well as innovate several excellent brands of smartphones. To support the function of smartphones, by far there have been numerous operating systems existed. Among them, Android is one of the most popular as well as trustworthy OS.
Just like any other smartphone, all Android devices have their ways to protect the data stored inside a smartphone from being corrupted or leaked. One of the simplest and most easy-to-use ways is to make use of the lock screen.
The lock screen has proved to be a traditional yet efficient way to help you protect your Android phones. In this article, we will provide you with an informative piece of writing about everything you need to know when it comes to the Android lock screen, and ways to enable and disable it.
If you have spent time searching and looking for features of your Android devices, you will find the process of enabling a lock screen is a piece of cake.
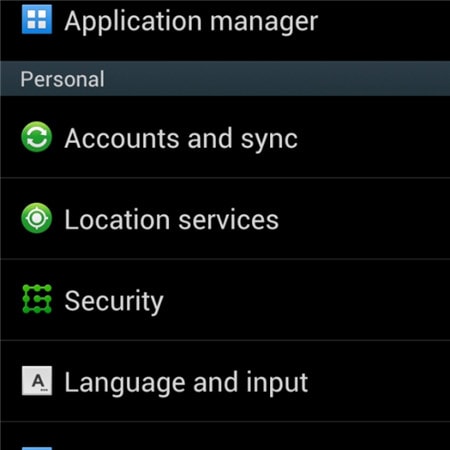
· Step 1: On the main screen of your Android devices, tap on the gear icon - which is the icon representing the Settings menu. Once you have chosen it, you will see a drop-down menu on the screen. In the options provided, tap on the Security bar.

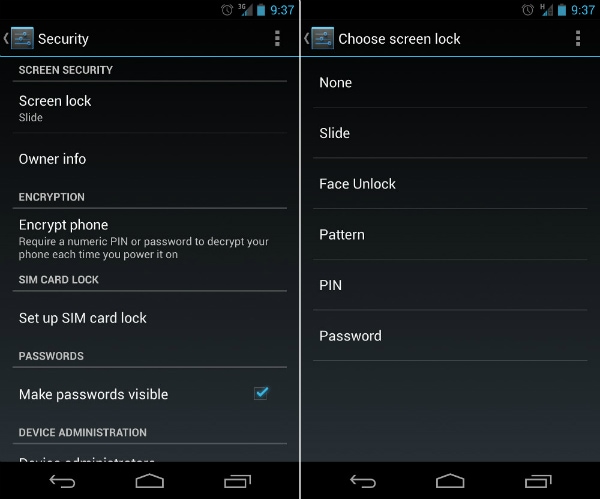
· Step 3: Once the step is done successfully, Android will give you plenty of choices about ways to lock your Android devices’ screens. Among these ways, select one particular type which you feel is most convenient as well as free-risk. After that, type in your PIN code to confirm the choice and finally activate your lock screen feature as you wish.
Part 2: How to Disable Android Lock Screen
To certain customers, the lock screen can do more harm than good, and they would prefer to disable the screen lock on their Android devices. This process is also an easy one to follow, as long as you still hold good memory of the security code.
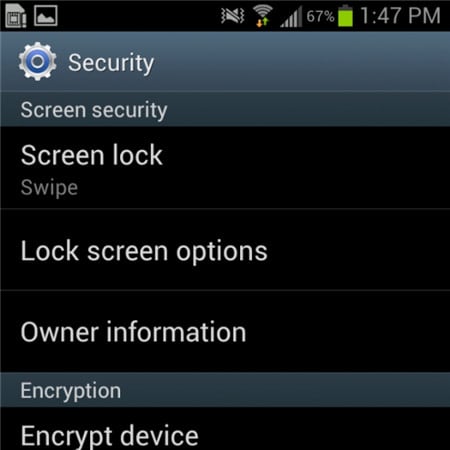
· Step 1: On the main screen of your Android devices, tap on the gear icon. It will directly lead you to the Settings menu of the phone. After that, a drop-down menu will appear with several choices and bars. Among them, tap on the Security option to begin your work.
· Step 2: Under the heading called Screen Security heading, you will be shown 3 choices. Tap on the first one, which is entitled Screen lock.

Step 5: In the end, you have successfully disabled the screen lock on your Android devices. You are now capable of using it without any hesitation about the screen lock.
Part 3: Common Problems of Disabling Lock Screen
The process to disable the screen lock on Android may seem easy to handle as well as straightforward to several customers, but there are still some annoying problems that users have to deal with while trying to disable the lock screen.
What are the top 2 common problems?
Below are the two most common problems faced by Android users during their efforts to disable the feature of screen lock.
1. In the Screen Security choice, the None bar can not be chosen.
Description of the problem: There is a sentence below it stated: “Disabled by administrators, encryption policy or credential storage”. All the space of the None option is in white and grey.
The solution to this problem is quite simple. Once you have made sure you are suffering from this nasty one, try to follow these below pieces of advice to see if it is capable of giving you a hand.
Step 1: Open the Settings menu from the main screen. Then tap on the Credential Storage. You will see a drop-down menu like the screenshot below.
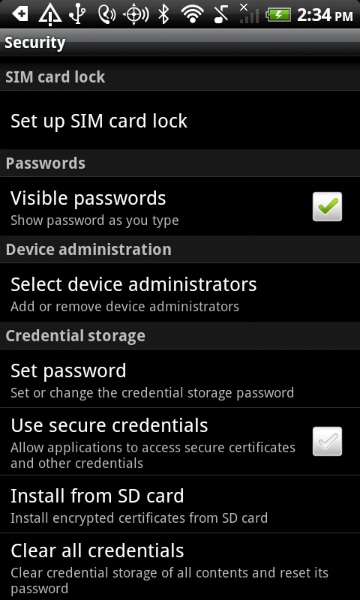
Step 2: Continue to tap on the Clear Credentials (Remove all certificates) option. Then next click on the OK button. Wait for some seconds until your Android device has finished the process.
Step 3: To make sure that the previous step has been performed successfully, try looking at the bottom of the drop-down menu. If the Clear Credentials (Remove all certificates) are grey out and can not be selected, then you have managed to do it.

Step 4: Now that the problem is solved, you can feel free to turn back to your Screen lock option in the beginning and disable the feature of locking screen Android as usual.
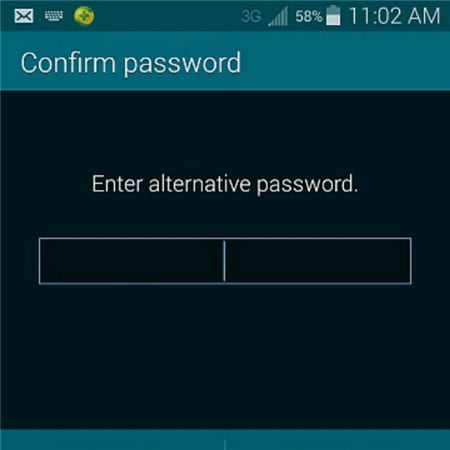
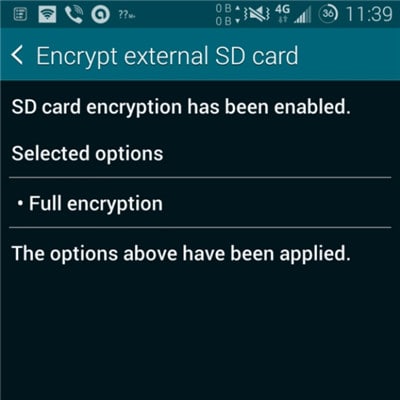
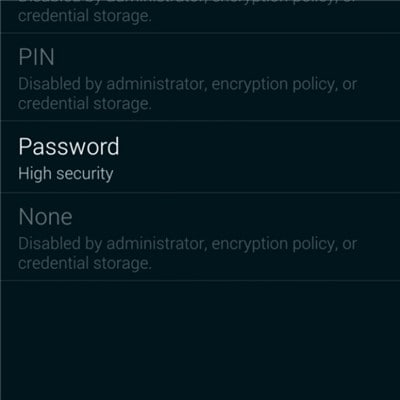
2. You have mistakenly encrypted your SD card. You want to disable the encryption, only to realize that it requires you to set a new screen lock code. But when you come to the Screen lock menu, all the options but Password have been greyed out.
Bonus Tip: Remove Android Screen Lock If Forgotten Password/Pattern
As much as the lock screen can protect the personal information on the phone, it can also cause much trouble if you forget the lock screen password or enter the wrong password too many times. So here comes the need for phone unlocking software . One of the best is Dr.Fone - Screen Unlock (Android), which can help us bypass forgotten Android screen locks without any data loss(limited to Samsung and LG series phones). Other Android brand phones will be wiped out all the data once starting to unlock with Dr.Fone
Dr.Fone - Screen Unlock (Android)
Remove 4 Types of Android Screen Lock without Data Loss
- It can remove 4 screen lock types - pattern, PIN, password & fingerprints.
- One-time payment for unlimited use of multiple devices within a specified time period.
- Work for Samsung Galaxy S/Note/Tab series, LG G2/G3/G4, etc.
- Besides, unlocking the screen lock, it also works best to unlock the Samsung FRP lock in devices with Android 5.0 and higher.
3981454 people have downloaded it
Steps on How to Unlock Forgotten Password in Android Phones
Step 1: Launch Dr.Fone and click on Screen Unlock from the primary window.
Step 2: Connect your Android device to the computer via USB cable. The program will recognize the phone directly. Select the phone model or “I can’t find my device model from the list above” to continue.


- Title: In 2024, How to Use Google Assistant on Your Lock Screen Of Vivo X100 Phone
- Author: Peter
- Created at : 2024-09-07 19:45:56
- Updated at : 2024-09-08 19:45:56
- Link: https://android-unlock.techidaily.com/in-2024-how-to-use-google-assistant-on-your-lock-screen-of-vivo-x100-phone-by-drfone-android/
- License: This work is licensed under CC BY-NC-SA 4.0.