
In 2024, How To Fix OEM Unlock Missing on Vivo X100?
How To Fix OEM Unlock Missing on Vivo X100?
Original Equipment Manufacturer (OEM) Unlock is a function on Android devices. It allows you to unlock your phone bootloader. A bootloader or bootstrap loader gathers the operating system files, loads them into memory, and hands over control, essentially starting your device. Unlocking the bootloader assists you in installing custom ROMs, flashing custom kernels, and rooting your phone.
However, this freedom comes with some trade-offs. Most manufacturers will void your warranty if you unlock the bootloader, and it can also make your phone face higher risks of malware and other security threats. Additionally, it can be difficult to relock the bootloader once you unlock it.
If you encounter the OEM unlock missing on your Android phone despite wanting to unlock your bootloader, this article can help. You will learn the step-by-step guide for the different methods to fix the missing OEM unlock option. Before diving into solutions, let’s explore why this option might be unavailable in the first place.

 ## Part 1: Why Is OEM Unlock Missing on Your Device?
Finding that OEM Unlock is missing on your Android phones can be frustrating, particularly if you plan to modify your software or install a custom ROM. But don’t worry. There are several possible explanations for this. Let’s explore some of the most common reasons:
Manufacturer Restrictions
The Missing OEM Unlock option can often be due to restrictions imposed by your device’s manufacturers. They may intentionally remove this option to safeguard device security and compatibility. It is common with carrier-locked devices. As a result, the OEM Unlock option may not show.
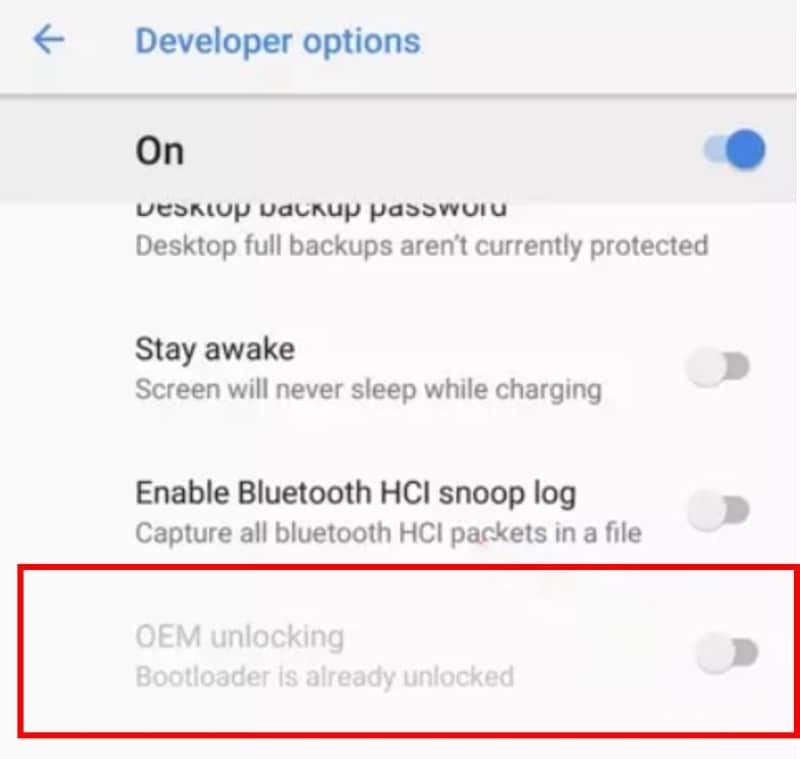
Bootloader Already Unlocked
In some cases, the Android OEM Unlock Missing issue arises when the bootloader has already been unlocked. Relocking the bootloader might make the option reappear. But exercise caution as this process can erase device data.
Developer Options Not Enabled
It might seem obvious, but sometimes the simplest things get overlooked. The OEM Unlock option can only be accessed from within Developer Options. If this menu isn’t enabled, you won’t see it.
Carrier-Locked Devices
The OEM Unlock Missing issue can also occur if your device is carrier-locked. Carriers often impose restrictions to prevent users from switching networks, and bootloader unlocking is one way to do that. Unfortunately, the missing OEM Unlock option is usually intentional, and unlocking your device can be more complicated.
Security Features
Enhanced security features, like Samsung’s KNOX, can sometimes conceal the OEM Unlock option. Temporarily turning off these features might show the option, but it’s crucial to be aware of the potential security implications of doing so.
Corrupted Bootloader
A corrupted bootloader can also lead to the Android OEM Unlock missing problem. The bootloader plays a role in the boot process, and if it’s damaged, it might not display the necessary options. This can be caused by software glitches, failed flashing attempts, or even hardware issues. In this scenario, you might need to consult your device’s manufacturer or a technical specialist to help repair or re-flash the bootloader.
Connectivity Issues
A poor connection between your device and computer can also prevent the OEM Unlocking from showing up. Check your cables and try using different USB ports to ensure a stable connection.
Part 2: How To Enable Missing OEM Unlock Without a Password?
Unlocking your phone’s bootloader (OEM Unlock) varies across models and brands. Some need a passcode or PIN after rebooting the phone, while others don’t. Even if your phone doesn’t require a separate password, your existing screen lock (password, PIN, pattern) will usually be needed to enable the missing OEM unlock option.
But what if you forgot that, too? Wondershare Dr.Fone - Screen Unlock can help bypass forgotten passwords and unlock your phone even if you don’t have the technical knowledge. Here’s a quick breakdown of its key features in this area:
- Success Rate
High success rate for bypassing various lock screen types, including PIN code, pattern lock, passwords, and fingerprints.
- Ease of Use
Provides a concise and intuitive interface that guides users with clear instructions and on-screen prompts.
- Comprehensive Features
Dr.Fone - Screen Unlock tool can remove the Android phone lock screen without resetting your Samsung or LG device. It can also help you bypass Google Factory Reset Protection (FRP) on mainstream Android brands.
- Extensive Device Compatibility
Aside from Samsung and LG, it covers a wide range of popular Android brands like Vivo, Huawei, Xiaomi, Oppo, etc.
Regain control in minutes with Dr.Fone. First, download the app to your desktop and install it. Once it’s up and running, launch Dr.Fone and prepare to unlock your device with ease. You’ll find detailed instructions below – even if you don’t know your phone’s lock screen, Dr.Fone has you covered.
- Step 1: Select Screen Unlock from the Toolbox homepage. Then, establish a connection between your locked Android device and your computer using a USB cable.

- Step 2: Specify the Vivo X100 device type for screen lock removal.

- Step 3: Select Unlock Android Screen to proceed.

- Step 4: Choose the brand of your phone from the supported brands.

Note:
The following steps will vary based on your device’s manufacturer. Please refer to the instructions on your screen to proceed into Download or Recovery mode.
- Step 5: The screen unlock process is underway. If it encounters trouble, click Try Again. Once Dr.Fone successfully unlocks your Android device, tap Done.

Developer Options, a hidden menu in Android, offers advanced features like app debugging and custom ROM installation. But if the Android OEM unlock option is missing, you can’t unlock your device’s bootloader. Below is a step-by-step guide for you so the OEM unlock missing option will show in the Developer Options. Remember, this process may erase your device data, so a complete backup is essential before proceeding.
- Step 1: Open the Settings app on your Android phone.
- Step 2: Navigate to About Phone at the bottom of the list, then tap Software information.

- Step 3: Tap on the Build number repeatedly (7 times) until you see a message saying, “You are now a developer!“ or similar.
- Step 4: Go back to Settings > System and find the Developer options menu.
- Step 5: Scroll down and tap the toggle switch next to Enable OEM Unlock to turn it on.

- Step 6: A warning message explaining the risks of turning on the OEM unlock will appear. Read it carefully and tap Enable if you want to proceed.

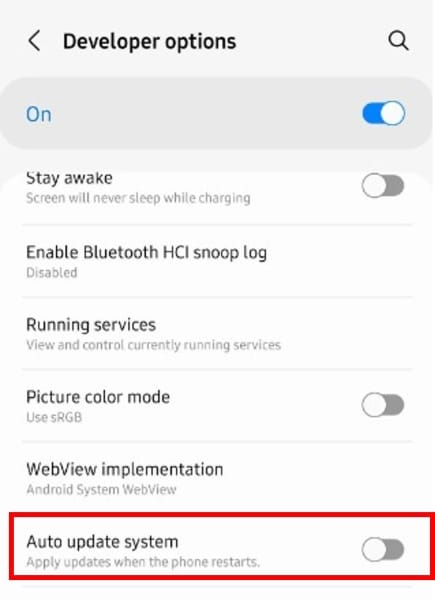
Some manufacturers intentionally delay the availability of the OEM unlock after a software update for security reasons. Changing the date to a past date before the update rolled out can trick the system into displaying the option, as it thinks the update hasn’t happened yet. It is a temporary fix, and the option will likely disappear again later when the Vivo X100 device automatically syncs the correct date.
If you intend to try this method, follow these steps to enable OEM unlock missing or greyed out after an Android update:
- Step 1: Open the Settings app.
- Step 2: Go to System or General management, depending on your Android version.
- Step 3: Tap on Date and Time.
- Step 4: Turn off Automatic date and time.

- Step 5: Tap on Set date and choose the desired older date from the calendar.
- Step 6: Tap on Set time and choose the desired time from the clock.
- Step 7: Tap on Done to save the changes.
- Step 8: Go back to the Developers options and turn off the Auto update system option.

Certain carriers restrict bootloader unlocking on their devices to ensure compatibility and prevent unauthorized modifications. For these phones, unlocking the SIM card becomes crucial before you can toggle the OEM unlock option. Here are the steps to fix the OEM Unlock missing or greyed out using SIM card removal:
- Step 1: Use the SIM ejector tool (often included with your phone) or a small pin to push the tray out.
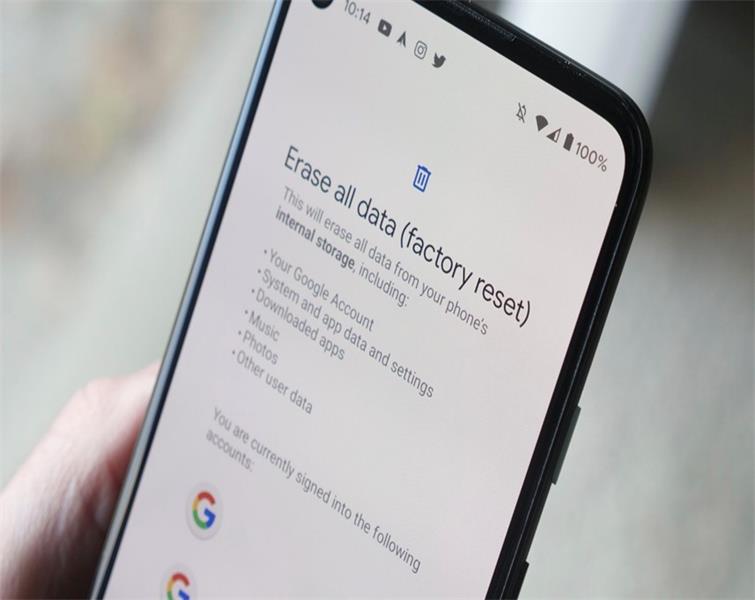
- Step 2: Go to Settings > General Management > Reset, then select Factory data reset. Enter your PIN or password if needed.

Conclusion
Having the OEM Unlock missing or greyed out can leave Android users feeling locked out of customization possibilities. Fortunately, this article has outlined helpful solutions like enabling the Android OEM Unlock missing option via the Developer Options. You can also try other methods above, like adjusting date and time settings or even a sim card removal trick. For those facing forgotten lock screens, we’ve offered guidance on bypassing them using the Dr.Fone - Screen Unlock tool to access the necessary phone settings.
While these methods provide a solid foundation, it’s always wise to research steps specific to your phone model. And never forget – caution is key. If things get technical, don’t hesitate to seek help from online communities or professional repair services.
Tips: Forget your device password and can’t get access to it? No worries as Dr.Fone is here to help you. Download it and start a seamless unlock experience!
Users of Android phones can benefit from data and file protection tools like passwords, patterns, and PINs. But there are also some significant disadvantages, for example:
- Someone may have repeatedly entered the wrong password to access your phone.
- You may have forgotten the PIN on your device, pattern, or PIN.
- The lock screen fingerprint can also malfunction if there are repeated tries from an unauthorized finger.
We can use many practical methods to remove the Android phone lock screen fingerprint. For example:
According to you, the most typical or initial option must be factory reset. However, when you try the factory reset method, you will lose all data on your phone. So, can you unlock an Android phone without a factory reset? Yes, we will tell you how to unlock your phone without fingerprint and resetting your Android phone.
Useful Methods to Bypass Fingerprint Lock
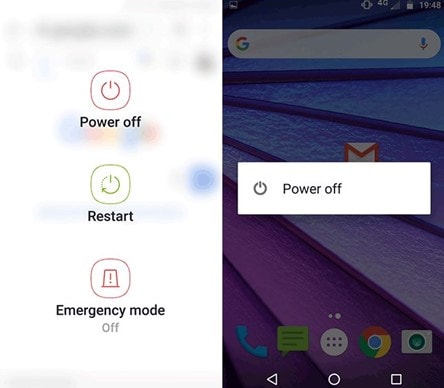
1. Restart your Phone
If your fingerprint is not working or the Vivo X100 device prompts you with an error in the fingerprint functioning, possibly the fingerprint reader is not responding, and the Vivo X100 device needs to restart to get rid of this error.
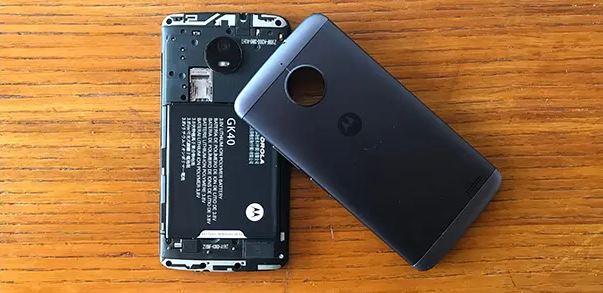
2. Remove your phone battery
Old android phones have removable batteries. If you can remove your phone battery, remove it and then put it back. Now turn on your phone. Doing so can help solve the fingerprint lock issue if there are bugs or system errors.
On Android handsets, you can attempt Dr.Fone to remove the fingerprint without professional skills. It allows you to delete the password, PIN, pattern, and fingerprint from an Android phone.
Step 1: Connect your Android device.
Open Dr.Fone on your PC, then among all the tools, choose “Screen Unlock.”
We are in this part to provide you with two ways to unlock practically any Android handset, including those made by Samsung, Huawei, OPPO, Vivo, Lenovo, LG, and others. It’s crucial to choose the right device brand to unlock the lock because the recovery modes for various phone models vary. The list contains every supported device model.


Step 3: Put your device into Recovery Mode.
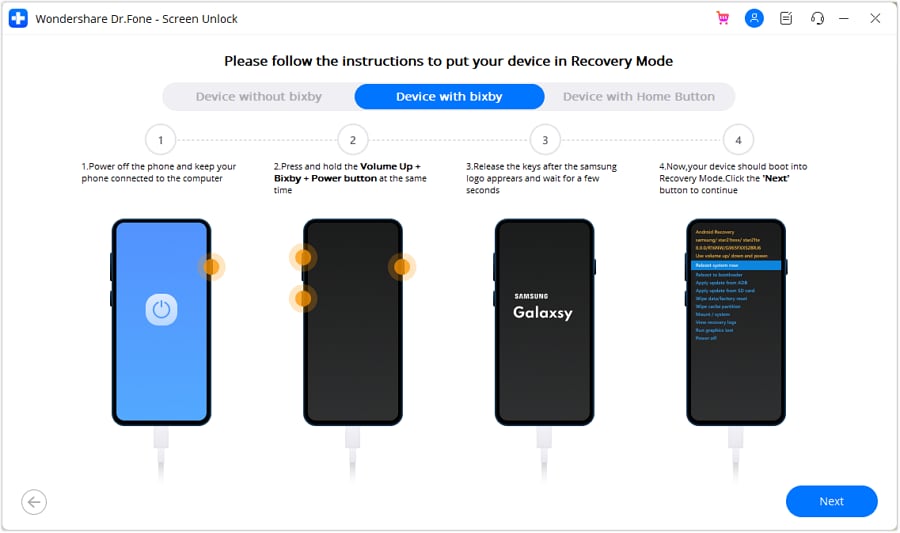
You will learn how to put your device into Recovery Mode; it’s important to do as instructions, although this part may look a little strange. And there are 3 different Samsung Recovery Modes as examples.
(Get into Recovery Mode in Samsung phone with Bixby)
(Get into Recovery Mode in Samsung phone without Bixby)

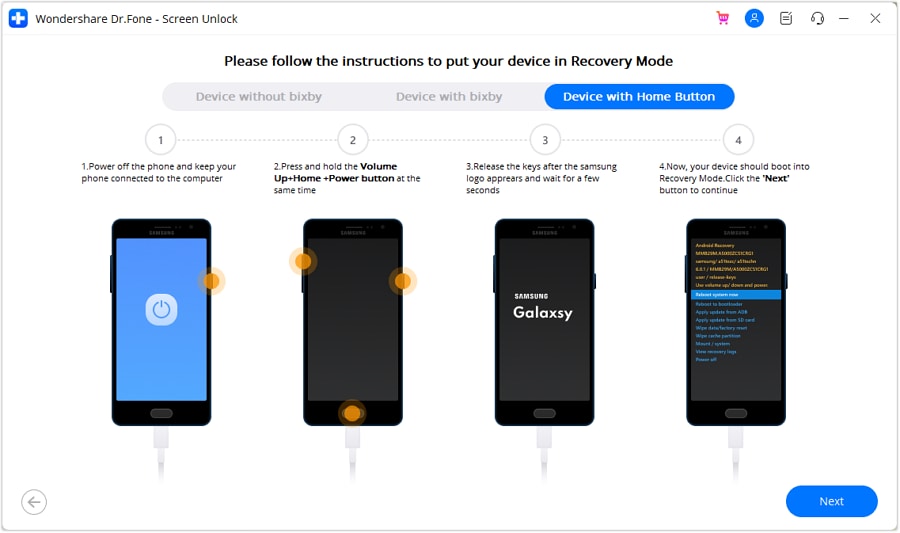
(Get into Recovery Mode in Samsung phone with the Home button)
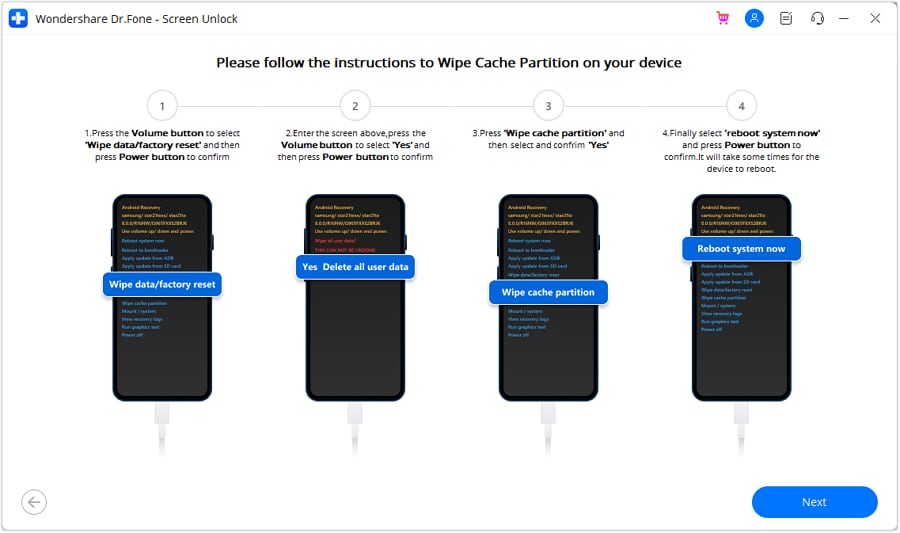
Step 4: Instructions to Wipe Cache Partition
In this part, it is the final but crucial step to unlock your device; if you click any wrong button, your phone may not work anymore.
OK, you already passed the unlock process; locks like pattern, password, or fingerprint disappear!

4. Hard Reset your Device
Users of Android smartphones and tablets can troubleshoot various issues with their devices using a feature known as Android Recovery Mode. For example, it might be helpful if you discover that your device is functioning strangely. Recovery Mode Android technically refers to a unique bootable partition with a recovery application installed inside it.
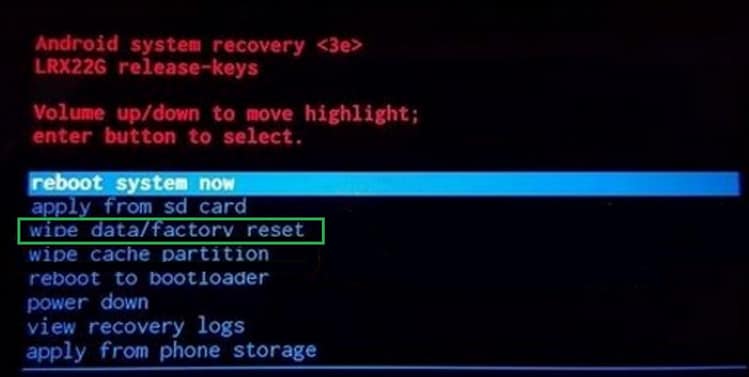
However, users can also use it to reset the android password if it is forgotten. This password also includes fingerprint locks. The instructions for resetting android devices through recovery mode differ for every android device.
5. Google Find My Device
As you are likely aware, every Android device is connected to a Google account. As a result, if you’d like, you may also use it to unlock Android. You’ll need to know your Google account login information for this. When you’re ready, use these instructions to find out how to unlock a phone password.
It might be a complicated case if you cannot reset your lock screen fingerprint through the methods described above. In this situation, you need to visit your nearest mobile technician, who can help you restore your device.
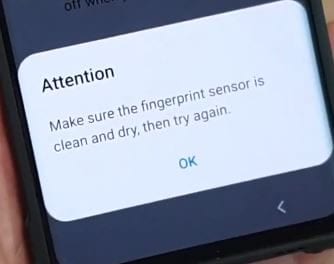
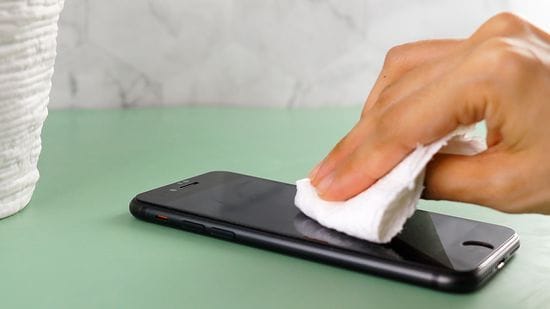
The fingerprint module should be clean, just like a clean finger is. Unfortunately, the module would collect liquid from your fingers, especially if you had used a moisturizer earlier, making it difficult for the sensor to read your fingers accurately.

Please inspect the fingerprint module for any fluids or debris and clean it with a dry cloth to resolve this. If the dirt is on the module, clean it with wipes or a moist cloth wet with water.
Another software-related issue that may occur because “ fingerprint sensor not working” issue is a software defect. Try checking if you have a pending update on your device and install it. Moreover, if the problem started after a system update, you may wait for a new update to fix the problem or go back to the previous update.
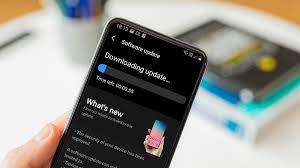
To install an update, open the Settings app, tap on ‘System,’ pick ‘System Update,’ and download and install any pending update.
If you have a device with under-display fingerprint scanner, you might need to clean the screen properly before using the fingerprint. In some cases, screen protectors also interfere with fingerprint functioning.
Any method can solve the problems of using your device with your Android handset. The best thing about these solutions is that you don’t need difficult professional skills to complete the tasks. Dr.Fone-Screen Unlock is the easiest way to help your device if you have a password or fingerprint problem.
Factory Reset Protection (FRP) is a security feature built into Android devices running Android 5.1 Lollipop and later versions. It prevents someone from using your phone after a factory data reset without Google account login credentials. The FRP makes it much less attractive for thieves to steal Android phones, knowing they will need help to access them.
FRP automatically activates when you add a Google account to your Android phone. It links the Vivo X100 device to your account, making it the “trusted owner.” Once activated, FRP becomes embedded in the phone’s system.
While Google FRP is a valuable security feature, it’s vital to acknowledge that there are legitimate situations where bypassing it might be necessary. These instances include forgotten Google account credentials, buying a second-hand device, and device issues. In these cases, tools like RootJunky can help you bypass FRP Lock. We’ll explore how to use RootJunky APK later, but first, let’s define what it is and its role in FRP bypass.

The RootJunky APK is a free Android application also called RootJunky SDL or RootJunky FRP Bypass tool. This app’s primary function is to bypass the Google Account FRP lock on Samsung devices. Rootjunky uses the weaknesses in Android’s setup process to create a new user account or switch existing ones, letting you bypass the FRP and regain control of your phone.
You can complete this process using the app by connecting your phone to a computer through an OTG cable. RootJunky can be helpfu l if you’ve forgotten your Google account password or bought a second-hand phone locked to someone else’s account. However, only use it if you have legitimate reasons to bypass FRP lock, like accessing your device after forgetting your Google account details.

Downloading the RootJunky FRP bypass tool from unofficial sources can introduce malware risks, so stick to trusted sources like the official website. Additionally, when exploring RootJunky, it is vital to keep the following in mind:
- Not all Android devices are susceptible to the methods used by RootJunky. It is necessary to check compatibility with your specific device model and Android version.
- Using FRP bypass tools like RootJunkycan potentially compromise the security of your device. Be cautious and proceed if you fully understand the risks involved.
- Bypassing FRP may involve data loss.
- Download RootJunky FRP bypass APK from a reliable source to minimize the risk of malware or viruses. You can check the APK file from official websites or trusted forums.
- Google constantly updates its security measures, so these tools may not always work effectively.
Part 2: How To Use RootJunky To Bypass Google FRP?
Here are the general steps to use the FRP Bypass APK RootJunky app to bypass Google FRP lock. But remember that specific steps may vary depending on your device and Android version:
- Step 1: On your computer, download the Rootjunky RealTerm program from the official Rootjunky website.


at + creg? \ r \ n
atd1234; \ r \ n
Step 10: Once connected, the Rootjunky APK on your phone will provide on-screen instructions to bypass FRP.
Step 11: If prompted, perform a factory data reset of your device.
While RootJunky offers a free method for FRP bypass, it can be incompatible with your device’s brand, requiring technical knowledge, tedious, and potentially risky. If you are looking for a simpler, safer, and more user-friendly solution, Wondershare Dr.Fone might be a better fit for you. If you want to learn how to use this tool to bypass FRP lock with minimal technical expertise, then keep reading.
Part 3: Easier Tool Than RootJunky APK To Bypass Google FRP
Google FRP adds an extra layer of security after a device reset. However, regaining access to the smartphone can be challenging if you forget your Google account details, forget your lock screen, or just buy a used device. While methods like the FRP RootJunky app exist, using it can be complex or risky.
Consider exploring third-party options like Dr.Fone for a potentially easier and safer FRP bypass solution. Dr.Fone Screen Unlock tool helps remove the Android FRP lock without requiring a PIN or Google Account.
Why Use Dr.Fone - Screen Unlock?
Here are some of the key features of Dr.Fone - Screen Unlock:
- **User-friendly:**Fone boasts an intuitive interface, eliminating the need for technical expertise. Even beginners can navigate the process with ease.
- **Widespread Brand Compatibility:**Fone supports mainstream brands, such as Samsung, Xiaomi, Oppo, Redmi, Realme, and Vivo, catering to a broader user base.
- **Fast and Efficient:**Regain access to your device in minutes without wasting time on tedious procedures.
Step-by-step Guide to Removing FRP Lock With Dr.Fone - Screen Unlock
Ready to leave the hassle of using RootJunky and easily bypass the FRP lock? Download and install Dr.Fone on your computer, then follow these steps to learn how to bypass Google FRP on your device:
- Step 1: Launch Dr.Fone on your computer and connect it to your Android device. Choose Screen Unlock from the Toolbox in the main interface.
- Step 2: Choose Android as your device type. This will take you to the next screen, where you can select Remove Google FRP Lock to proceed.
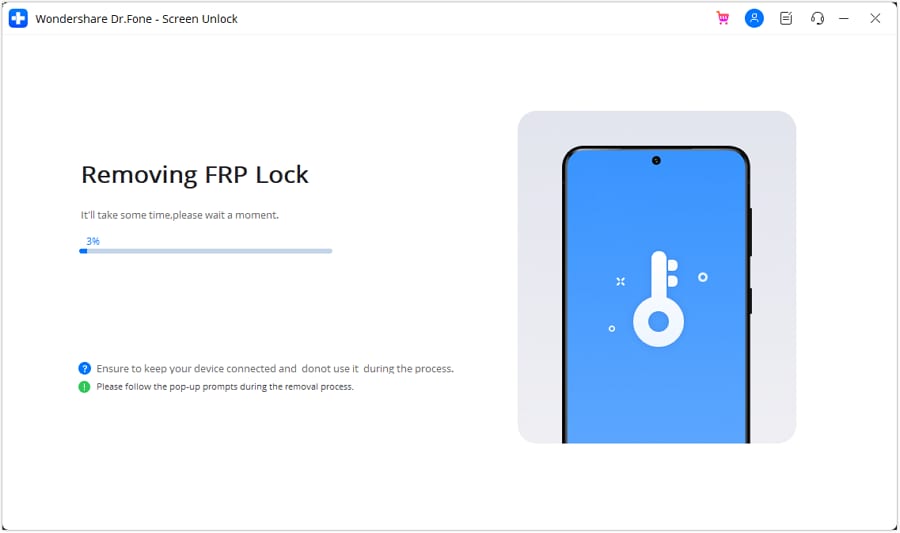
- Step 3: Select your device’s brand from the list and click Start to continue.

Note:
The next steps may vary depending on the brand you selected.
- Step 4: Select the OS version of your device and click Start to continue.

- Step 6: When your Samsung prompts you to activate USB debugging, tap Allow. Then, on your computer screen, click Authorized to confirm.

- Step 8: Click Done if the FRP lock removal was successful, otherwise, click Try Again to repeat the process.

That’s it! With Dr.Fone Screen Unlock, you can easily bypass Google FRP and regain access to your Android device, leaving the complexities of RootJunky behind.
Tips: Are you searching for a powerful FRP bypass tool? No worries as Dr.Fone is here to help you. Download it and start a seamless unlock experience!
Both RootJunky and Dr.Fone offer options for you to regain control of phones with Google FRP lock. FRP Bypass RootJunky tool excels with its free-to-use approach, perfect for tech-savvy users comfortable with APK installations. While requiring a paid subscription, Dr. Fone provides pre-rooted firmware installations and broader device compatibility, which is ideal for those seeking a more streamlined but supported experience.
The best choice boils down to your personal needs and budget. Remember, FRP bypass should only be utilized by rightful owners facing genuine lockouts. When used responsibly, these tools can help you access your phone after a factory reset even without your Google account credentials. Choose the tool that best fits your needs and proceed with caution. Use these tools responsibly and regain access to your device the right way.
- Title: In 2024, How To Fix OEM Unlock Missing on Vivo X100?
- Author: Peter
- Created at : 2024-09-07 19:46:44
- Updated at : 2024-09-08 19:46:44
- Link: https://android-unlock.techidaily.com/in-2024-how-to-fix-oem-unlock-missing-on-vivo-x100-by-drfone-android/
- License: This work is licensed under CC BY-NC-SA 4.0.