
How to Unlock Vivo Y56 5G Phone without Any Data Loss
How to Unlock Vivo Y56 5G Phone without Any Data Loss
In today’s digital age, our Android phones serve as the primary hub of our lives, holding a treasure trove of personal and professional data. Yet, the frustration of being locked out due to forgotten passwords or malfunctioning security features can be overwhelming, compounded by the fear of data loss during the recovery process. However, there’s a beacon of hope - a way to unlock your Android phone without any data loss. In this comprehensive guide, we will explore the latest techniques, tools, and methods to regain access to your Android device safely without a password, PIN, or fingerprint. Let’s dive into it now.
## Part 1. How to Unlock Vivo Y56 5G Phone with Dr.Fone - Screen Unlock (Android)If you or someone accidentally forgot or mistyped/misentered your lock password and caused it to lock permanently, of course, you will find ways to unlock it at first. But if you are not connected to the internet, or did not register a Google account for your device, your last resort would be to factory reset your device. That will totally wipe everything you have and save it on your device. If you want to unlock your lock screen without having to worry that your device data will be erased, Dr.Fone - Screen Unlock (Android) is your phone unlocking software .
 safe & secure
Note: This tool temporarily support unlocking part of Samsung and LG locked screen without losing data, but other Android phone will be wiped all data if you try to unlock the screen with Dr.Fone - Screen Unlock (Android).

Dr.Fone - Screen Unlock (Android)
Remove 4 Types of Android Screen Lock without Data Loss
- It can remove 4 screen lock types - pattern, PIN, password & fingerprints.
- Only remove the lock screen. No data loss at all.
- No tech knowledge asked. Everybody can handle it.
- Work for Samsung Galaxy S/Note/Tab series and LG G2/G3/G4.
4,464,578 people have downloaded it
Steps on How to Unlock an Android Phone with Dr.Fone - Screen Unlock (Android)
Step 1. Connect your Android phone to your PC with Dr.Fone installed, then run the program.
Step 2. Then, you should see the “Screen Unlock” tool, so proceed into it. After that, click “Android” > “Unlock Android Screen.”

Step 3. Then choose “Remove without Data loss” to unlock part Samsung/LG devices without data loss and find your device model.

Step 4. Follow the instructions on the program to get the Android phone into “Download Mode.”
- 1. Power off the phone.
- 2. Press and hold volume down + home button + power button at the same time.
- 3. Press the volume up to enter download mode.

Step 5. The loading process will take you a few minutes because it is going to verify first your device’s compatibility.
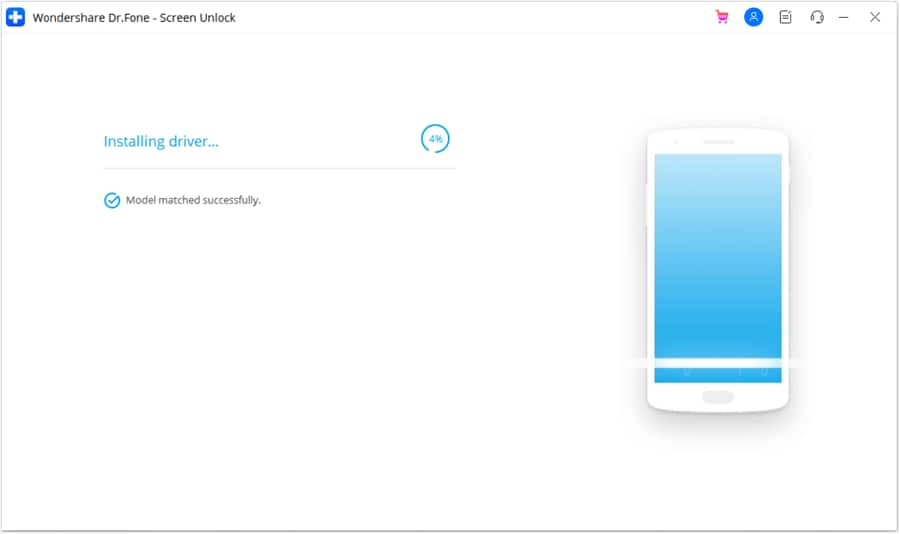
Step 6. Wait until everything is done. You should then see your device already has no lock screen.

That’s how to unlock an Android phone with just one click using Wondershare’s Dr.Fone. If your device is not Samsung or LG, you can use a more advanced mode to unlock your phone .
Part 2. How to Unlock Android Phone with Aroma File Manager (with Data Loss)/h2>
If you weren’t able to open your Wi-Fi or data connection or enable USB Debugging, this is the way for you to unlock your lock screen. This could be a bit complicated, but it should work.
Steps are provided below, and please follow the step-by-step guide carefully to avoid a boot loop or any other damage.
Step 1. Download Aroma File Manager on your PC. This is a tool that unlocks Android phones. Android users can use it for free.

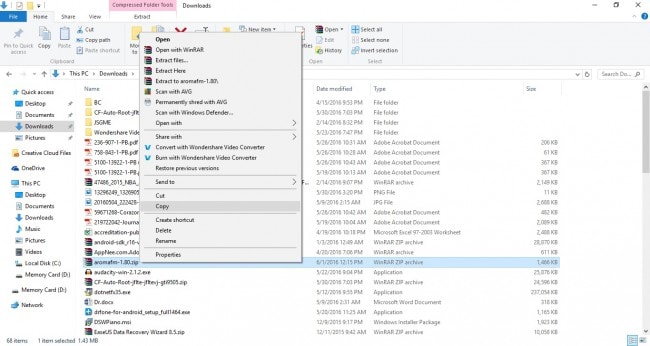
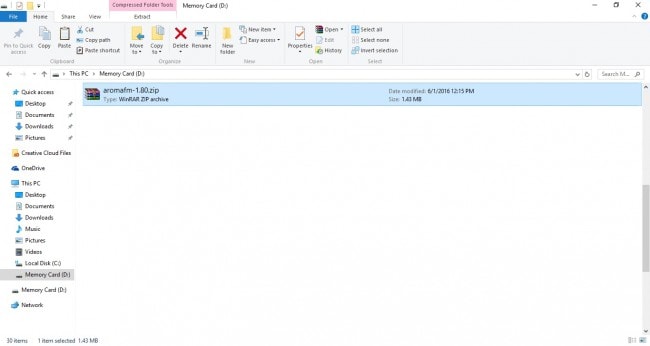
Step 2. Go to your Downloads folders and copy the downloaded zip file.
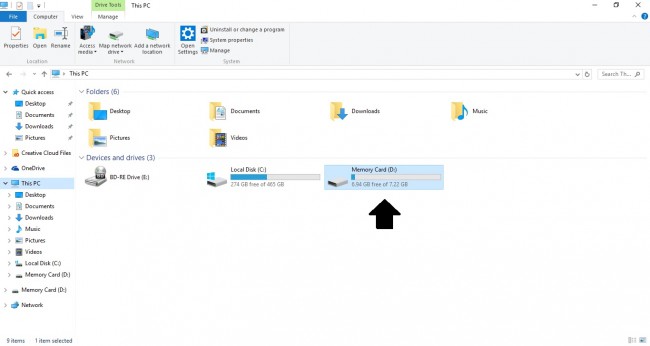
Step 3. Plug into your PC a memory card that you can insert into your phone later. Then, go to your list of connected devices and select the memory card.
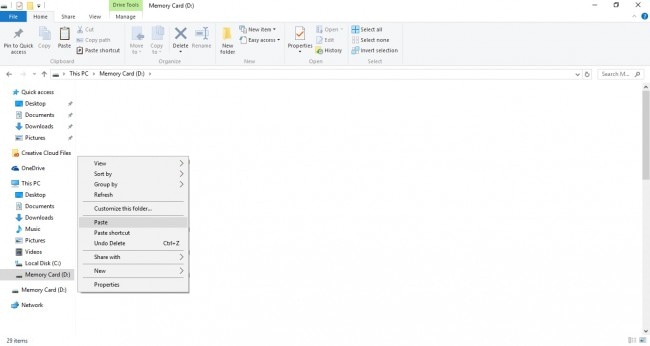
Step 4. Paste the copied Aroma zip file. Once copied, eject it from your PC, then insert it into your Android device.
Step 5. Enter Recovery Mode for your device. Each Android device has its own ways of entering recovery mode, so take a look at this link and find your device.

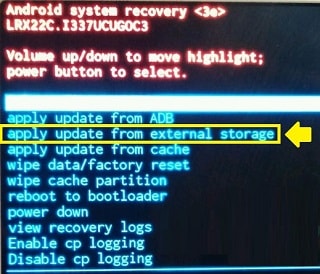
Step 6. When you are already in Android Recovery Mode, use your volume keys to navigate to ‘’apply update from external storage’’, then select the zip file you copied a while ago. It will be flashed on your device.
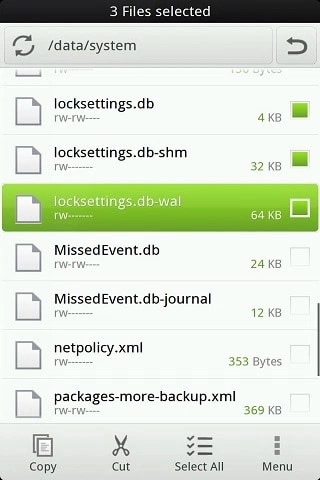
Step 7. After it, restart, and recovery mode will reopen as Aroma File Manager, so go to its settings and select ‘’Automount all devices on start’’, then restart. Back in Aroma File Manager, go to the directory data>system. Check if the ff. exist. If they do, delete them. Then restart again.
- gesture.key (pattern) / password.key (password)
- locksettings.db
- locksettings.db-shm
- locksettings.db-wal
- signature.key
- sparepassword.key
Now you have your device booted up, and your Android lock screen is still locked, just gesture in or enter anything. It will be unlocked. And that’s how to unlock an Android phone using your device.
Part 3. How to Unlock Android Phone Using Minimal ADB and Fastboot (with Data Loss)
If you weren’t able to connect to the Internet, but you, fortunately, enabled your USB Debugging option before your device was locked, the ARONSDB tool from the Android SDK package can help you unlock your Android phone.
Here is the step-by-step guide for you to follow
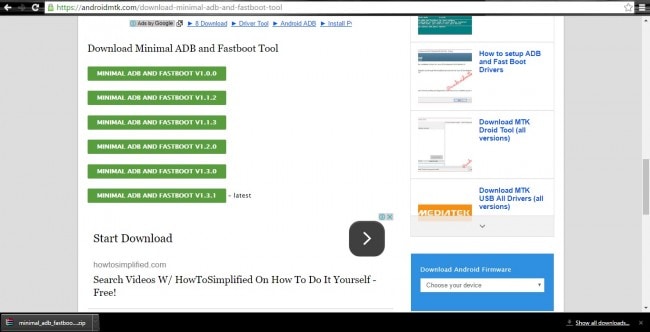
Step 1. Go to Minimal ADB and Fastboot download page.
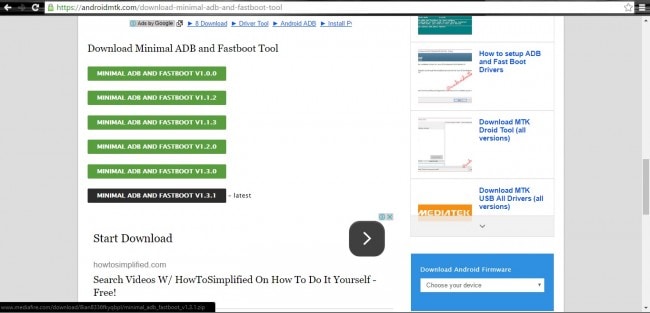
Step 2. Download the tool’s latest version.
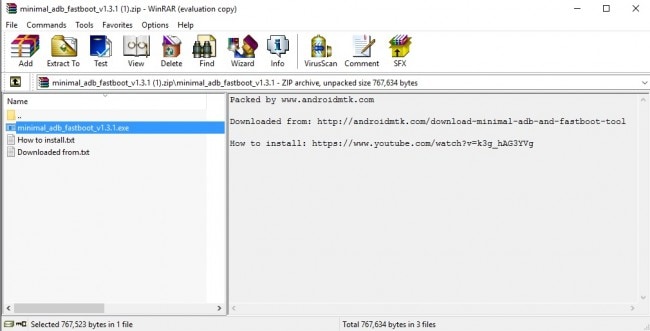
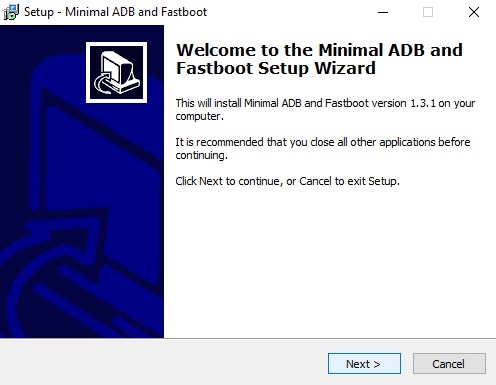
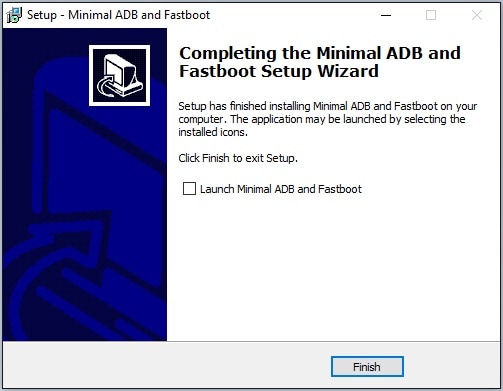
Step 3. Open the downloaded Minimal ADB and Fastbootzip file and install it.
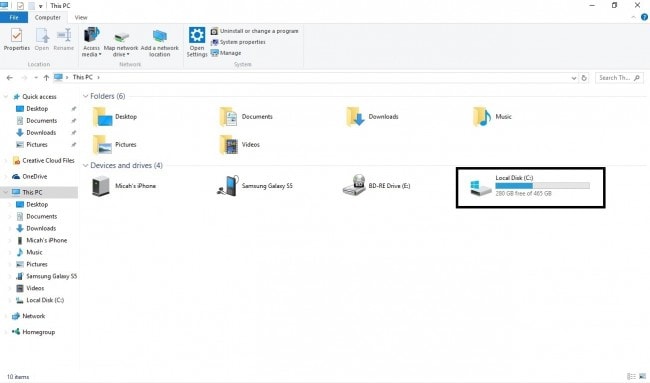
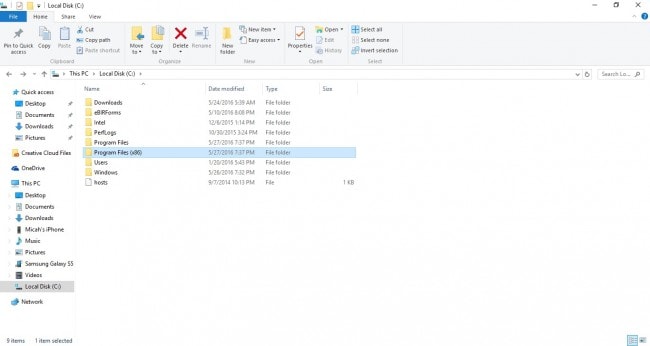
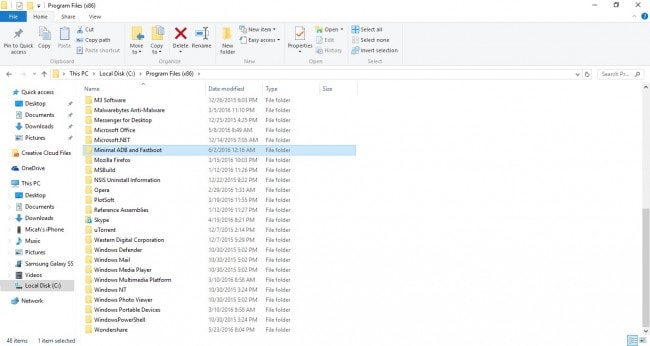
Step 4. Make sure your device is connected, then go to the Minimal ADB and Fastboot installation directory.
This PC [Win 8& 10] or My computer [Windows 7 & below]> Local Disk (C:) [primary drive]> Program Files [for 32-bit] or Program Files (x86) [for 64-bit] > Minimal ADB and Fasboot.
Step 5. Inside the folder, hold the Shift key on your keyboard, then right-click your mouse. An additional “Open command window here” will appear so select that.
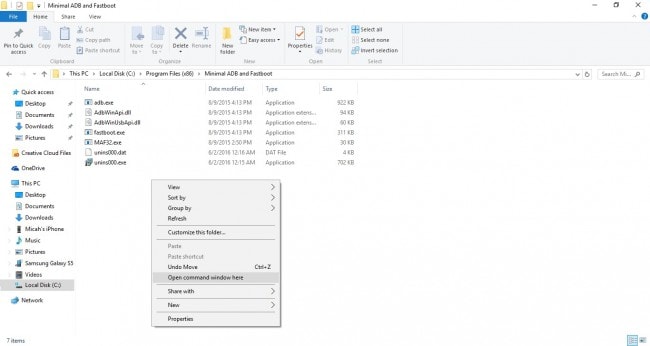
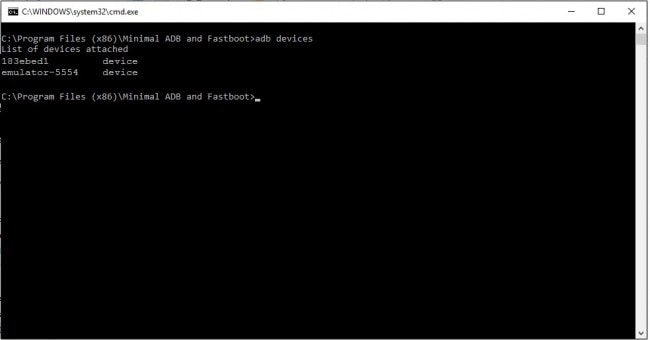
Step 6. ADB terminal will pop out. Now, the first is to type in ADB devices. This is to check if your device is recognized by ADB. If there is no device listed below, try to remove and reconnect your Vivo Y56 5G and retype the command. If there are listed devices already, proceed.
Parental Control Software
Step 7. Finally, type in the following commands one by one. These commands will remove your lock screen.
- adb shell
- cd /data/data/com.android.providers.settings/databases
- sqlite3 settings.db
- update system set value=0 where
- name=’lock_pattern_autolock’;
- update system set value=0 where
- name=’lockscreen.lockedoutpermanently’;
- .quit

This would work if you have your USB debugging turned on before it was locked. That’s how to unlock Android using ADB.
Part 4: How to Unlock Phone via Find My Device (with Data Loss)
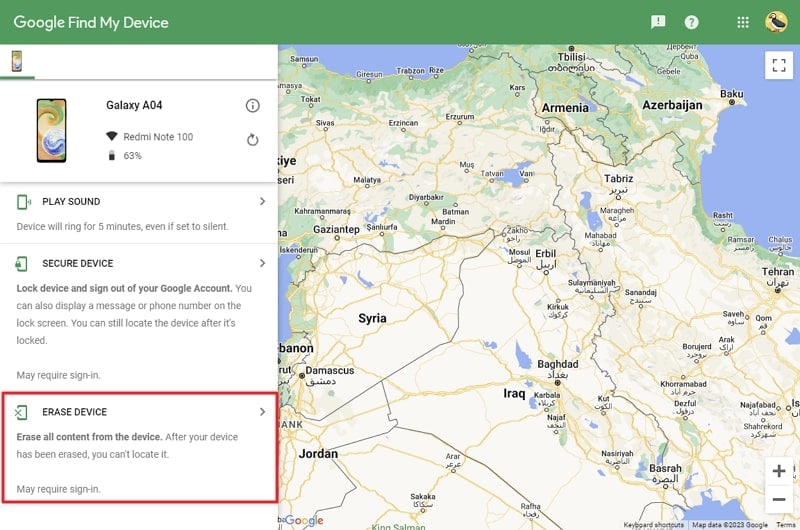
Google Find My Device is another handy way to unlock your locked Android device. However, it requires you to have your Google ID credentials and you have previously enabled Find My Device features. Moreover, it will erase all the data on your device. Use the following steps to unlock your Android phone via Find My Device:
Step 1: Open a web browser on a computer or another device and visit the Find My Device website. Now, sign in with the Google account that is linked to the locked Android device.
Step 2: After signing in, you will see a list of devices associated with your Google account on the left side of the screen. Select the locked Android device from the list and choose the “Erase Device” option from the menu on the left-hand side.
Step 3: You will now be asked to confirm your identity through a Google account password or using a pass-key. Afterward, follow the on-screen instructions to erase and unlock your Android device.
Part 5: How to Unlock Android Phone without Losing Data in Safe Mode
One way to unlock your Android phone without losing the data is by utilizing Safe Mode. This method works only if the screen lock you have been using is a third-party app. Since Safe Mode disables third-party apps, you can easily use it to uninstall the problematic app. Here is how to unlock an Android phone without losing data:
Step 1: On your Android device, press and hold “Power” and “Volume Down” keys together for 3 seconds. After the Power menu becomes visible, press and hold the “Power off” option.
Step 2: After a while, you will see the “Safe Mode” option on your screen with some basic instructions. Now, you can use the button to boot into Safe Mode and remove the screen lock application.

Part 6. How to Unlock Android Phone without Any Data Loss Using Google Account (Android 4.4 or lower)
If luckily, you left your Wi-Fi open and luckily connected to the internet, this is the easiest way to unlock your Android phone.
The step-by-step guide for you to refer
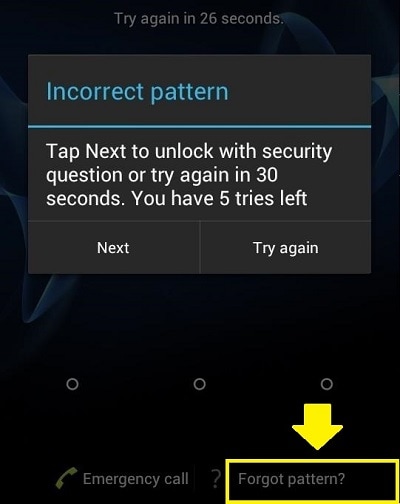
Step 1: Retry the incorrect password or pattern until the ‘’Forgotten Password/Pattern’’ appears below. Then select that.
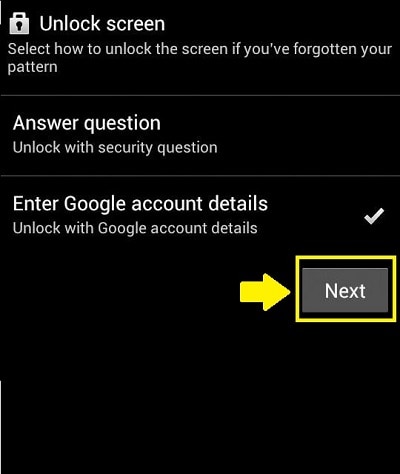
Step 2: Check ‘’Enter your Google Account details’’ then tap next.
Step 3: Input your Google Account details, username, and password. You are done.
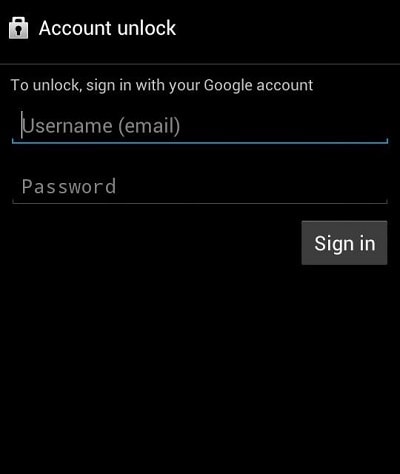
You will be given the option to input a new password or pattern right after you enter your Google account details. But if not, Google must have emailed you your temporary password or pattern that you will input to unlock your lock screen.
Can I Bypass a Forgotten Phone Password Of Vivo Y56 5G?
Screen locks on smartphones are crucial for keeping the data in your phone hidden. Password for phone becomes necessary when you have critical data on your phone. However, there is a downside to it.
Many people forget their screen lock, and that’s normal. That can happen if you accidentally type a new lock screen password incorrectly. Apart from that, there are many other explanations too. In short, you can get locked out of your device, which is a terrible experience. It can waste your time if you need something stored in your phone.
Here we have mentioned solutions to let you bypass your lock screen password. All the solutions mentioned here are safe and will work almost 100% of the time.
Part 1: How Can I Set or Change My password?
- Open the Settings application and tap the Security choice.
- Under Device Security, tap Screen Lock.
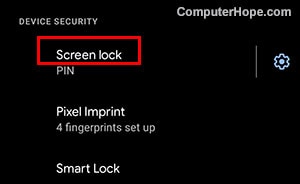
- Select a Screen lock option, i.e., Swipe, Example, PIN, Password, etc.

- When you pick your choice, follow the guidelines on the screen to set it. Enter your screen lock straightaway.
- Then redo your screen lock on the following screen, then, at that point, tap Confirm.
Part 2: 4 Simple Ways to Bypass Your Vivo Y56 5G Phone Password
1. Google Find My Device
Our first approach to unlocking your device is to do a factory reset. That erases every one of the data on your phone too. You can perform this method if you have your Google account credentials and are ready. However, we want you to back up your data so you can sign once more after the reset and restore a ton of your data.
Since you’re locked out, you will have to utilize a technique to do the reset. The most straightforward way is to utilize Google’s Find My Device site. So, if the Find my Device option feature is enabled on your phone, you can tap the Erase device choice on this page to reset it.

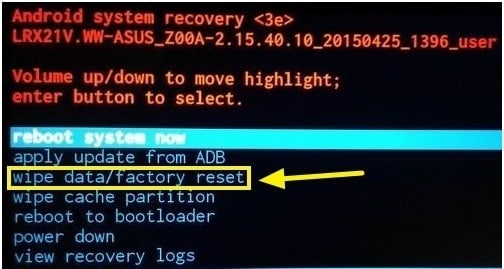
2. Enter Recovery Mode to Hard Reset
If you can’t use the Find my device feature, you’ll have to factory reset physically. To do as such:
- Power your device off.
- Hold the Volume (-) and power keys all the while after the screen goes dark to raise Android’s bootloader menu. This button blend might be different relying on your device model.
- Press the Volume down button two times to feature the Recovery Mode choice. Then, at that point, press the power button to choose it.
- Hold the power button and press the Volume up button to enter this mode.
- Utilize the volume buttons to go to the Wipe data/Factory Reset choice. Continue with the steps to play out a factory reset.
3. Use ADB
This fix isn’t guaranteed to work; if you don’t watch out, it could damage your phone. Therefore, we suggest you back up everything on your Android before proceeding.
If your phone has USB debugging enabled, is connected to a PC, and is not encrypted, follow these steps:
- Connect your device to your PC through a USB connector.
- Open Command Prompt or Terminal window to your ADB installation registry.
- Type in adb shell rm/data/system/gesture.key and click the Enter key.
- Reboot your phone. When you do, the solid lock screen ought to be gone.
- That is not a permanent condition, so reset your PIN or password lock before you reboot your device once more. That’s how you reset password for phone.
4.Dr.Fone-Screen Unlock
If you want to unlock your phone without losing any data, we suggest Dr.Fone-Screen Unlock. Dr.Fone is a professional unlocking tool that can remove all types of screen locks in minutes. Dr.Fone is an all-in-one solution for all your iOS and Android needs. So, if you need a quick solution for your phone, download it now.
Step 1. Connect your Android telephone
Open the tool on your PC and select the “Screen Unlock” tool.

When the entire process is finished, you can access your Android device without entering any PIN and view all your data on the Vivo Y56 5G device.
Step 2. Select Unlock Android Screen tool
We provide 2 options for you, and to unlock screen, you should select “Unlock Android Screen”.
Step 3. Select device model
There are still 2 buttons to choose, “100% Remove Screen Lock” is for most Android brands, but please back your device up before you pick it.
Check the brands list and make sure your unlock process keeps.

Step 4. Enter into Recovery Mode
Then follow the instructions on the program to get the Android phone into Recovery Mode. Here we take 3 different models of Samsung phones as example. (Note: Processes are different according to different brands).
Recovery Mode in Samsung Phone with Bixby
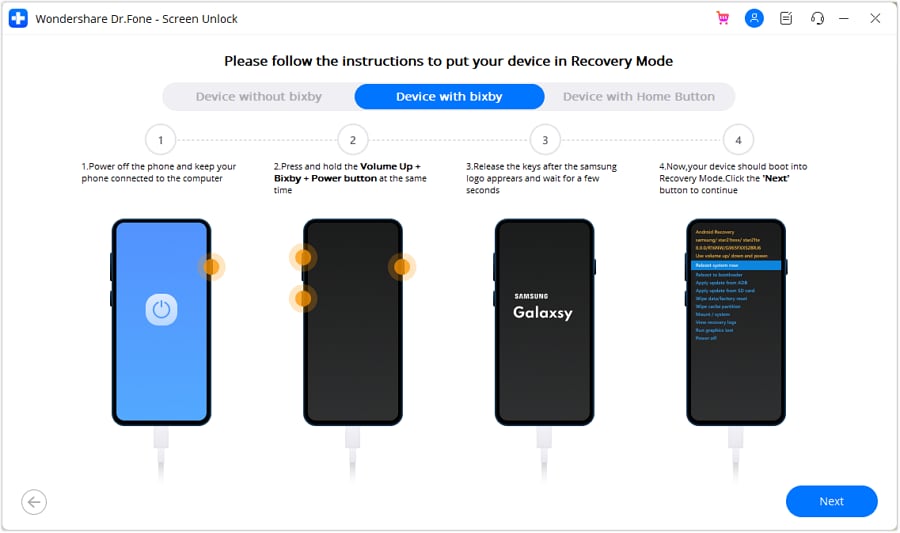
Recovery Mode in Samsung Phone without Bixby

Recovery Mode in Samsung Phone with Home Button
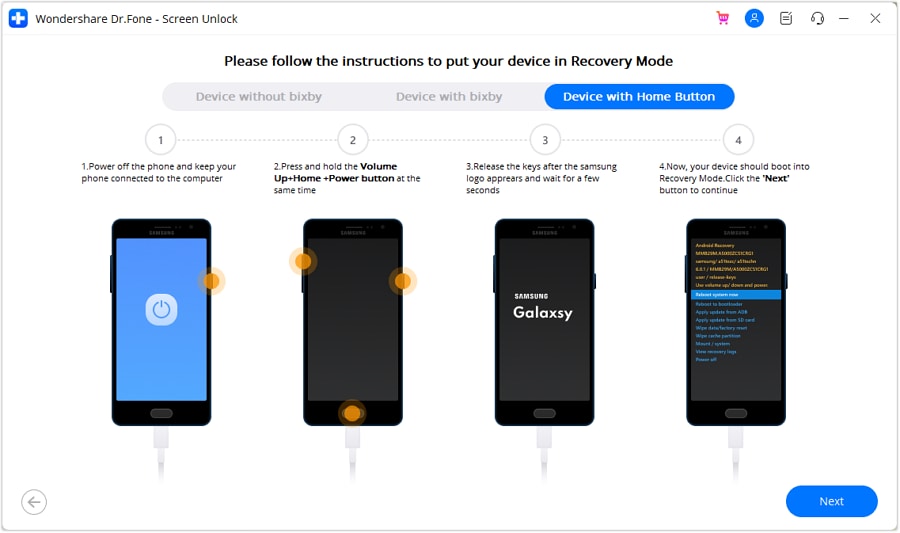
Step 5. Instructions to Erase Cache Partition
Steps in Recovery Mode are really important, find the correct options and your locked screen will be removed.

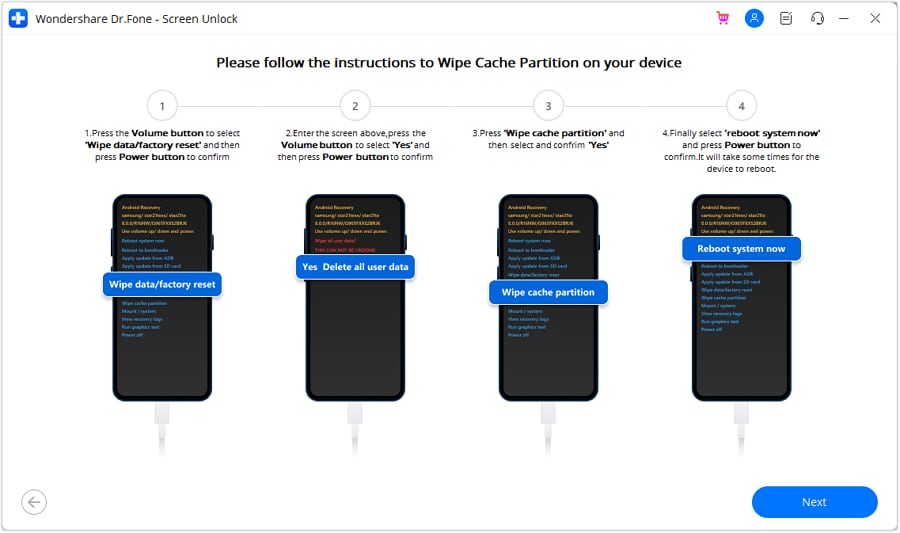
Now it’s a phone everyone can access without password or pattern.

Part 3: How to Back up My Vivo Y56 5G Easily?
Dr.Fone-Phone Backup
As we all know, unlocking a lock screen password involves a hard reset, which can delete your user data. Therefore, you must back up your files before hard resetting.
There are several tools available to back up your files. You can use Google or your phone manufacturer’s cloud services to back up your file. However, none of them are secure enough. So, we suggest Dr.Fone-Phone Backup have a secure and reliable backup experience. Dr.Fone lets you choose the files you need and back them up. Moreover, you can restore those files to your phone once it gets unlocked.
The Bottom Line
Getting locked out of your phone can be frustrating, especially if you need an important file from it. However, there are solutions to get over this issue and unlock the password for phone. This article contains all you need to unlock your device and return it to be normal. Moreover, if you don’t want to lose your data, give Dr.Fone a try. It is currently the best unlocking and backup tool in the market.
Unlocking the Power of Smart Lock: A Beginner’s Guide for Vivo Y56 5G Users
Google constantly comes up with features to simplify the way users interact and complete tasks on the Android platform. One of the most important features that techies loved to debate about was the Smart Lock Android, a secure password manager functioning in sync with a Google account on the Android phone.
Part 1: What is Android Smart Lock?
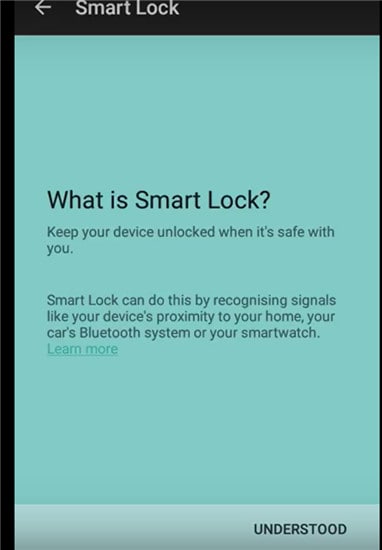
Android Lollipop added a feature called Smart Lock, and the feature was devised as a smart tool to prevent the Android phone from locking once it was initially unlocked. In other words, the feature overrides an Android phone’s Lock Screen feature, thereby saving users the need to enter passwords every time the Vivo Y56 5G device locks.
If you’re at home, it’s likely your android phone is locked out if you haven’t accessed at for some time. Smart Locks solves the problem in many ways. It allows you to allocate trusted places. Once you within range of the trusted places, your phone won’t lock. Trusted devices come next. Smart Lock is assigned to Bluetooth and Android NFC unlock devices.

Finally, trusted face unlocking is the ultimate face recognition system that unlocks your Android device as soon as you look at it across the front-facing camera. A face unlock first introduced with Android Jelly Bean and has been significantly improved in later versions.
Turning On Smart Lock
The feature is enabled by first accessing settings. For example, in a Samsung Galaxy S6:
Tap on Settings, which is the gear symbol.
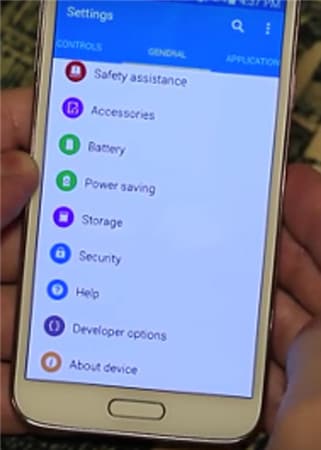
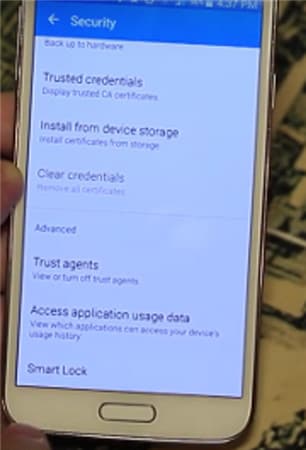
- • Click on Personal and tap on Security.
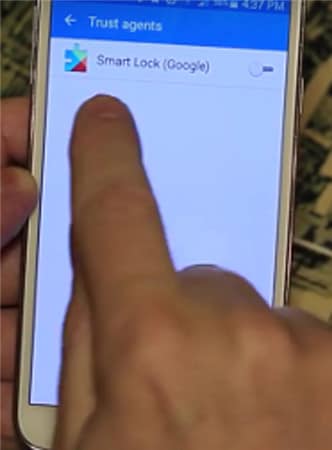
- • Go to Advanced and tap on Trust agents and make sure Smart Lock is turned on.
- • Under Screen Security tap Smart Lock.
- • Here, you need to enter your Screen Lock. If you haven’t done so, set up a password and PIN by following the on-screen prompts. The screen Lock is needed every time you have to change the Smart Lock settings.

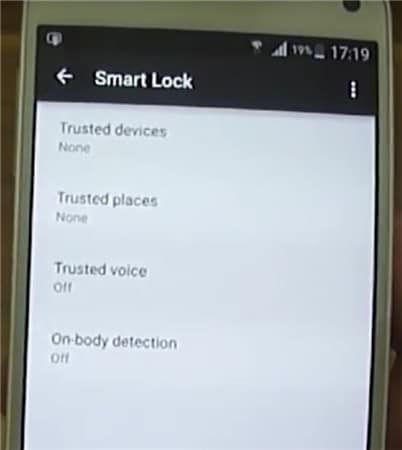
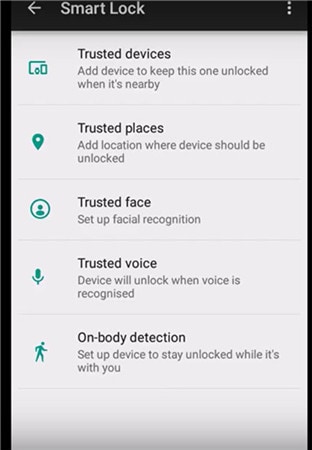
Within Smart Lock, there are three options for setting the system. You can set up trusted devices, trusted face, and trusted places individually, combining two or all three at the same time. You can choose just one trusted face, but you have the option to set up as many trusted devices and trusted places as needed.
Part 2: Turn On Smart Lock For Android with Trusted Devices
You can decide on a trusted device to be paired with Smart Lock Android.
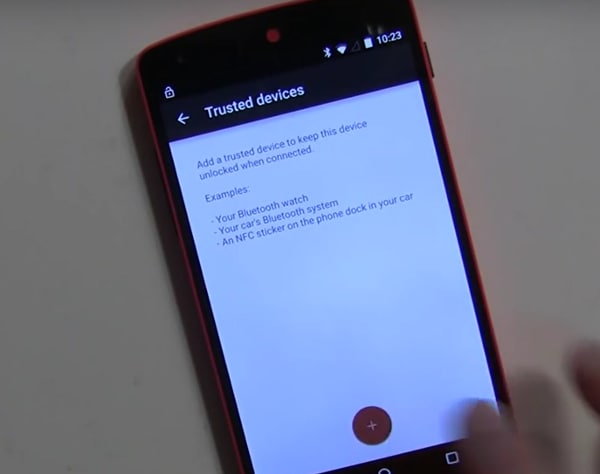
For example, you can set up a Smart Lock for Bluetooth in your Android Bluetooth settings. It can also be done for Android NFC unlock devices. Examples include the Bluetooth system in your car, NFC unlocks, android sticker on the car’s phone dock, or Bluetooth in your watch.
- • Go to Settings.
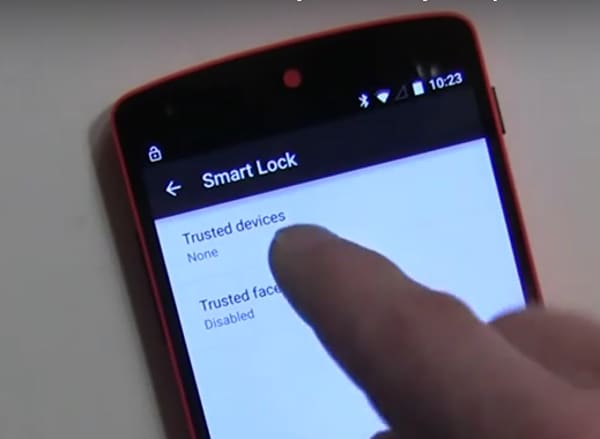
- • Tap on Security and then Smart Lock.
- • Existing paired options are listed under Trusted Devices.
- • Initially, trusted devices will show None.
Tap on Add Trusted Devices.
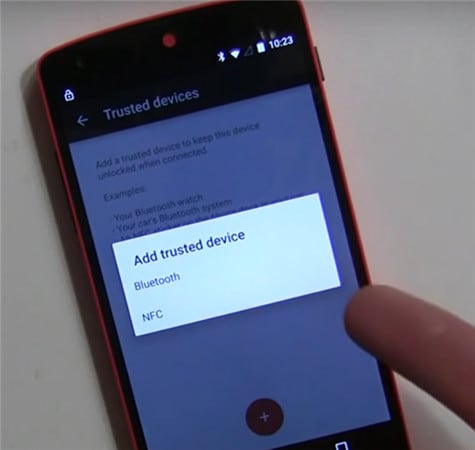
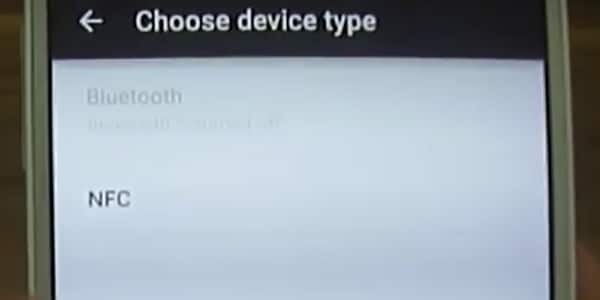
The next screen is the Choose Device Type.


Since you have already paired Bluetooth, it will ask you to choose the Vivo Y56 5G device from the list.
- • As an example, let’s take the case of LG HBS800. It may show Not connected until you add it.
- • It will show up under Trusted devices in the Smart Lock menu.
- • When you turn the added device on, Smart Lock now unlocks the Android mobile.
Similarly, other Bluetooth and NFC unlock android supported gadgets can be added under the list of Trusted Devices.
Part 3: Turn On Smart Lock For Android With Trusted Locations
You can also add locations or addresses to Smart Lock Trusted Locations, and the phone unlocks automatically as soon as you arrive at the desired location. For example, you can set up your home or work address under Trusted Locations.
Check current settings first.

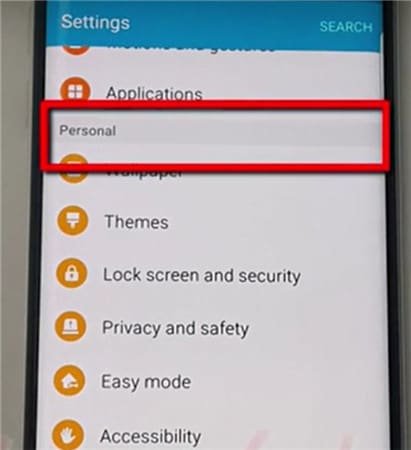
On a new Android phone, visit Settings>Personal.
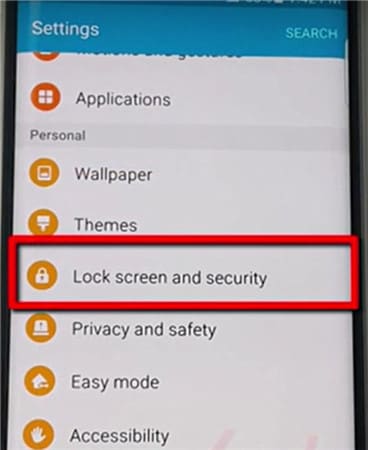
Then Lock Screen and Security.
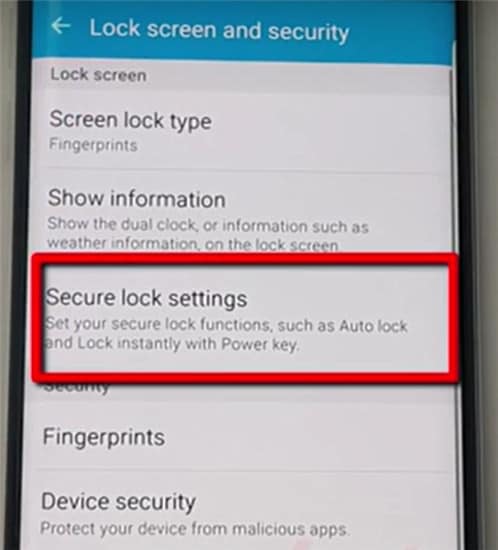
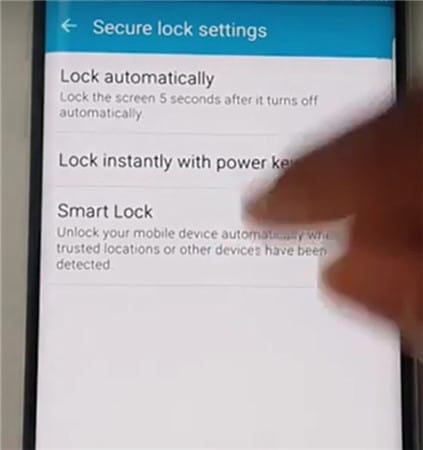
Then Secure Lock Settings.
Tap Smart Lock.
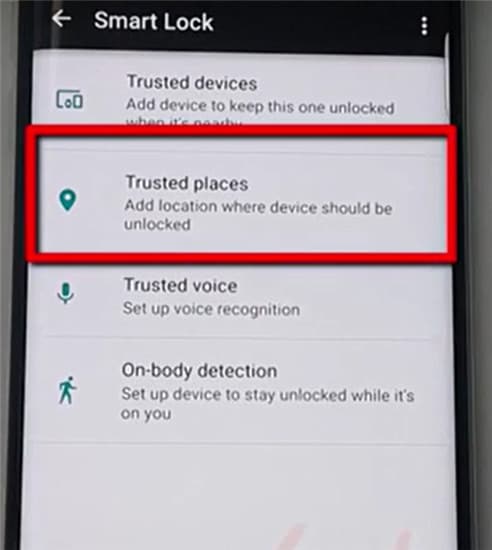
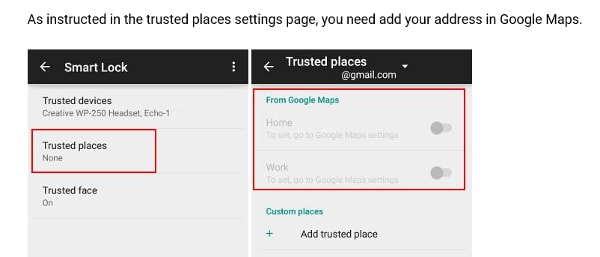
Tap on Trusted Places.
Tap on Add Trusted Places
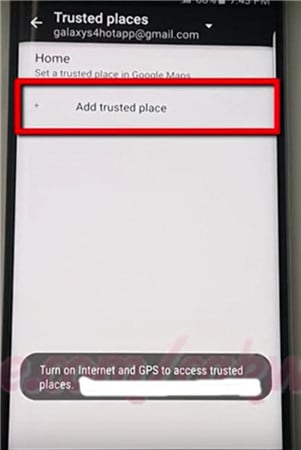
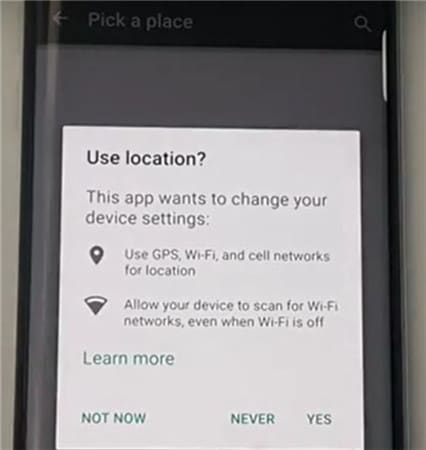
- • Initiate the Google Maps app on the Android phone. Make sure the Internet and GPS are on.
- • Pick a place.
- • Click on Settings.
- • Click on Edit home or work. You can now add or edit the required addresses.
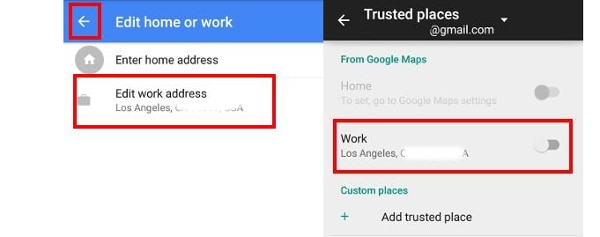
- • As an example, click on the Enter work address.
- • You now have the option to type in the address or use the address listed on Google Maps as the required work address.
- • A successful addition is listed and can be edited under the Edit work address.
- • Close the Google Maps app.
- • The work address is automatically propagated and configured with Smart Lock settings.
- • Go back to Settings> Security> Smart Lock> Trusted Places.
- • The work address you added is now listed under Work.
- • However, it is not yet configured as a Smart Lock option. Tap the location once, and it is enabled.
- • The switch along the address to the right turns blue, indicating it is enabled.
- • The work address is now listed under Trusted places for Work.
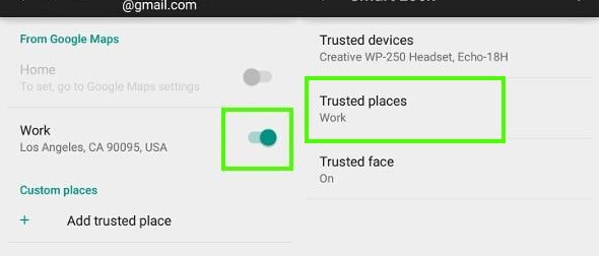
- • The phone is now configured for the work address and will unlock whenever you are at the location.
- • Since it works on Google Maps, the feature works through an Internet connection.

Part 4: Turn On Smart Lock For Android With Trusted Face
The feature recognizes your face and then unlocks the Vivo Y56 5G device. Once you set up the Vivo Y56 5G device to recognize your face as a trusted face, it will unlock the Vivo Y56 5G device as soon as it recognizes you.
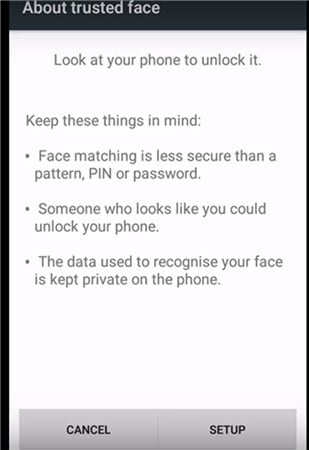
PRECAUTION: At best, this can be the first level of security, as one who resembles you to some extent can unlock the Vivo Y56 5G device. Photographs are not stored in the system. The device does hold necessary data to recognize your face, and the security level is determined by how good the Vivo Y56 5G device is configured. The data is not accessed by any app or loaded onto a Google server for backup.
Setting Up Trusted Face
- • Go to Smart Lock and tap Trusted Face.
- • Tap on Setup. Follow on-screen instructions.
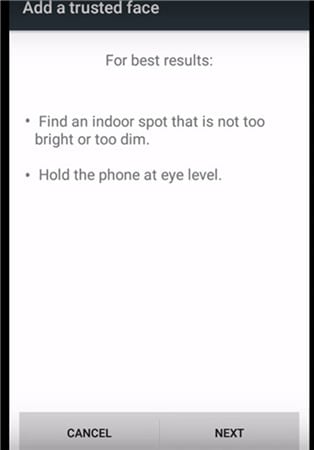
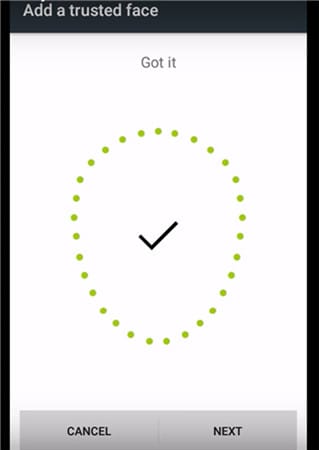
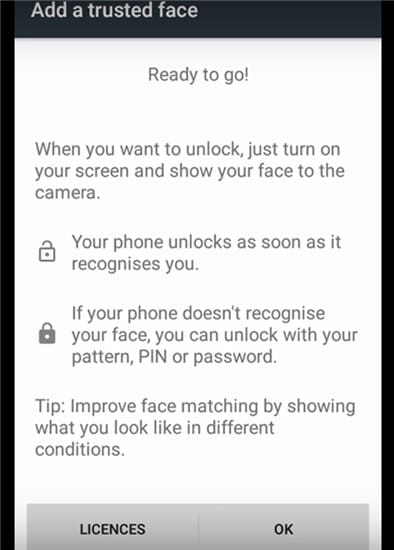
The device begins to gather data about your face. The trusted face icon appears. As a backup, in case Smart Lock does not recognize your face, use the manual system by applying the PIN or password to unlock the Vivo Y56 5G device.
In case Trusted Face is not required, tap on reset Trusted Face appearing under the Trusted Face menu. Tap on Reset to reset the option.
How To Improve Facial Recognition In Your Bluetooth and Android NFC Unlock Devices
- • If you feel facial recognition is not up to the mark, go to Smart Lock and tap on a Trusted face.
- • Tap on Improve face matching.
- • Tap on Next and follow instructions on the screen to complete the task.
Smart Lock Android is a great feature and is only going to improve on time. With added security measures being introduced by Google for Bluetooth and NFC unlock android devices, including configuration to Google maps and Gmail, the feature may be one of the most important features to overcome constant blocking of devices even in protected places.
Video on How to Remove Android Lock Screen Without Data Loss
- Title: How to Unlock Vivo Y56 5G Phone without Any Data Loss
- Author: Peter
- Created at : 2024-07-16 10:55:38
- Updated at : 2024-07-17 10:55:38
- Link: https://android-unlock.techidaily.com/how-to-unlock-vivo-y56-5g-phone-without-any-data-loss-by-drfone-android/
- License: This work is licensed under CC BY-NC-SA 4.0.