
How to Unlock Vivo Y100A Pattern Lock if Forgotten? 6 Ways
How to Unlock Vivo Y100A Pattern Lock if Forgotten? 6 Ways
“How to unlock pattern lock on my Android phone? I have changed my pattern lock and can’t seem to remember it now!”
Lately, we have got lots of feedback and queries like this from our readers who like to perform a pattern unlock on their devices. It doesn’t matter if you have forgotten the password/pattern of your Android device or would like to access someone else’s phone, there are plenty of ways to know how to unlock the pattern on an Android phone. In this comprehensive guide, we will let you know about 6 different ways to perform pattern unlock without any trouble.
Part 1: How to Unlock Android Phone Pattern Lock with Dr.Fone - Screen Unlock (Android)?
If you want to unlock the pin, pattern, password, fingerprint, or any other kind of lock on an Android device, then simply take the assistance of Dr.Fone - Screen Unlock (Android) . It is a highly useful and advanced application that can let you move past the lock screen on your Android phone without losing data (if your phone model is not Samsung or LG devices in this list , it will erase the data after unlocking the screen).
Dr.Fone - Screen Unlock (Android)
Remove Pattern Locks on Android Screen at Ease
- Remove 4 screen lock types - pattern, PIN, password & fingerprints.
- Bypass Android FRP lock without a PIN or Google account.
- Unlock mainstream Android brands like Samsung, Huawei, LG, Xiaomi, etc.
- No tech knowledge is needed. Everybody can handle it.
4,008,669 people have downloaded it
To learn how to unlock pattern lock using Dr.Fone, follow these steps
- Step 1. Install Dr.Fone and launch it to perform pattern unlock. From the home screen, select the “Screen Unlock” option.

- Step 2. Connect your device to the system. Once it is detected, click on the “Unlock Android Screen” button.


- Step 3. Select your device brand to unlock and access reboot instructions, then follow them to complete the process.

- Step 4. You will be notified when the process is completed. Simply disconnect your Vivo Y100A and access it without any pattern lock.

Part 2: How to Unlock Pattern Lock with Android Device Manager?
Besides Dr.Fone, there are also a few more options to learn how to unlock pattern locks on an Android device. Though, these options are not as secure or fast as Dr. Fone’s. For instance, you can take the assistance of Android Device Manager (also known as Find My Device) to do the same. It can be used to remotely ring a device, change its lock, locate it, or erase its content. To learn how to unlock pattern lock on Android, follow these steps:
- Step 1. Go to Android Device Manager (Find My Device) website https://www.google.com/android/find and log in using your credentials.
- Step 2. A list of all the connected devices to your Google account will be provided.
- Step 3. As you would select your device, you will get various options: erase, lock, and ring.


- Step 4. Click on the “Lock” option to change the lock pattern on your device.
- Step 5. Provide the new password for your device and write an optional recovery message.

- Step 6. Apply these changes and exit the window to change the lock on your device.
Part 3: How to Unlock Android Pattern Lock Using the ‘Forgot Pattern’ Feature?
If your device is running on Android 4.4 or older versions, then you can also take the assistance of the “Forgot Pattern” option to perform the pattern unlock. You won’t need a third-party tool or any other device to perform the desired operation. To learn how to unlock pattern lock on your device, follow these steps:
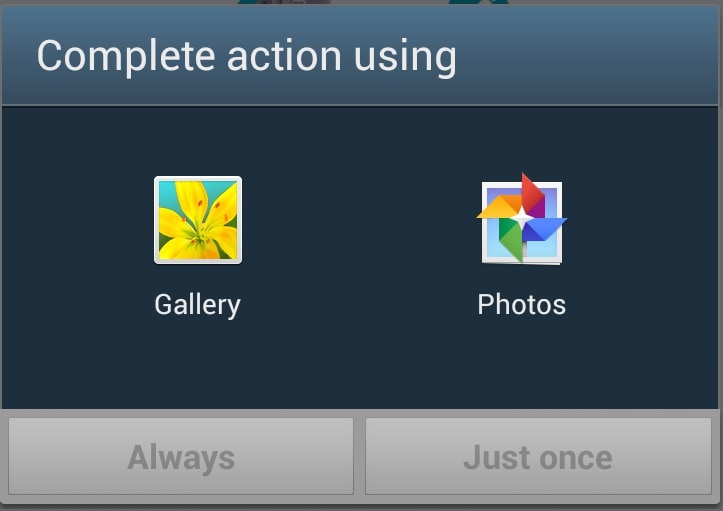
- Step 1. Simply provide any incorrect pattern on your device to get the following screen.
- Step 2. From the bottom of the screen, you can tap on the “Forgot Pattern” feature.

- Step 3. Select the option to unlock your device with your Google credentials.

- Step 4. Provide the correct Google credentials of the account that is linked to your device.
- Step 5. Later, you can set a new pattern for your device and confirm it. This will let you access your Android device with the new pattern lock.
Part 4: How to Unlock Samsung Phone Pattern Lock Using Samsung Find My Mobile?
Just like Android, Samsung has also developed a dedicated feature for finding a device remotely and performing various other operations on it. The Samsung Find My Mobile service can be used to locate your device, change its lock, wipe its data, and perform a few other tasks as well. Needless to say, the service only works for Samsung Android devices. You can learn how to unlock patterns with this tool by following these instructions:
- Step 1. Go to Samsung’s Find my Mobile official website https://findmymobile.samsung.com/ and log in using your Samsung account credentials.

- Step 2. You can select your device from the left panel. By default, it will provide its location on the map.

- Step 3. Additionally, you can access various other services from here as well. Click on the “Unlock My Device” option to proceed.

- Step 4. Now, all you need to do is click on the “Unlock” button to perform pattern unlock on your device.
- Step 5. After unlocking your Samsung device, you will be informed of an on-screen message.
Part 5: How to Unlock Android Pattern Lock in Safe Mode?
This is a simple and effective solution to knowing how to unlock patterns on an Android device. Nevertheless, this solution will only work for third-party lock screen apps. If you are using your phone’s native lock feature, then it might not work. After restarting your phone in Safe Mode, you can easily move past its pattern lock without any trouble. All you need to do is follow these steps:
- Step 1. Simply press the Power button on your device to get the Power menu on its screen.
- Step 2. Now, tap and hold the “Power off” option.
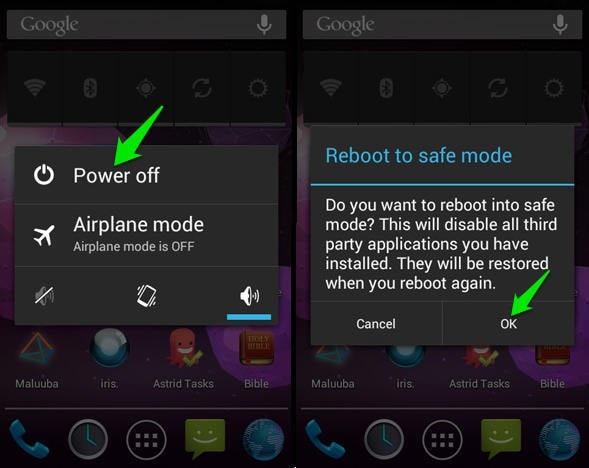
- Step 3. This will display the following pop-up message. Agree to it and restart your phone in Safe Mode.
- Step 4. Once the Vivo Y100A device would be restarted in Safe Mode, the third-party lock screen would be disabled automatically.

- Step 5. Later, you can go to the Vivo Y100A device’s Settings > Apps and remove the third-party app as well. In this way, you would be able to learn how to unlock pattern lock for any other app.
Part 6: How to Unlock Pattern Lock with the Factory Reset?
Consider this as your last resort, as it will wipe the data and saved settings on your device entirely. As the name suggests, your device would be restored to its factory setting by losing its data. Though, if you wish to learn how to unlock a pattern by performing a factory reset, then you can perform these steps:
- Step 1. To start with, enter the Recovery Mode on your device. This can be done by pressing the Home, Power, and Volume Up key at the same time.
- Step 2. Though, the correct key combination might differ from one version of the Android device to another.
- Step 3. Use the Volume Up and Down key to navigate and the Power/Home button to make a choice.

- Step 4. Select the wipe data/factory reset option to perform pattern unlock.
- Step 5. Confirm your choice to factory reset your device.


- Step 6. Wait for a while as your phone will perform the needed operations.
- Step 7. Later, you can choose to reboot your phone and access it without any lock screen.
Conclusion
By following this guide, you would certainly be able to learn how to unlock the pattern lock on your device without much trouble. We recommend using Dr.Fone - Screen Unlock (Android) to perform pattern unlock with no data loss. It has a user-friendly interface and is sure to yield the desired results. Now when you know how to unlock patterns on an Android device, you can share this information with others as well to help them!
 safe & secure
How to Lock Apps on Vivo Y100A to Protect Your Individual Information
If you are not a fan of having to go through the process of getting through a pattern or password every time you want to use your phone, the good news is that you don’t have to. There are really just a few Apps on your Android device that have sensitive information you don’t want others getting access to. It would really be great if you could lock those apps individually as opposed to locking the Vivo Y100A device as a whole.
Well, in light of helping you out, this article will address just how you can lock Apps on your device and not have to type in a code every time you want to use the Vivo Y100A device.
Part 1. Why you need to Lock Apps on Android?
Before we get down to the business of locking some of your Apps, let’s look at some of the reasons why you would want to lock certain apps.
- You may simply want better access on your device. Locking certain apps will allow you to easily access the Vivo Y100A device and use it without having to remember passwords and patterns.
- If you are a person who is not good at remembering passwords or patterns, simply locking certain apps will help you not get locked out of your entire device which can cause a lot of problems.
- If your device is used by more than one person, locking certain apps will keep the other users out of information you would rather they didn’t access.
- If you have children, you can eliminate the many accidental in-app purchases by locking the apps your children shouldn’t be on.
- Locking apps is also a good way to keep children from content they shouldn’t be accessing.

Part 2. How to Lock Apps in Android
There is always a good reason to Lock Apps on your device and we have two easy and effective methods you can use to do this. Choose the one that you are most comfortable with.
Method One: Using Smart App Protector
Smart App Protector is a freeware that allows you to lock specified applications.
Step 1: Download and Install Smart App Protector from the Google Play Store and Launch it. You may be required to install a helper application for Smart App Protector. This helper will ensure that the many App services running on your device will not be killed by third party apps.
Step 2: The default password 7777 but you can change this in the Password & Pattern Settings.

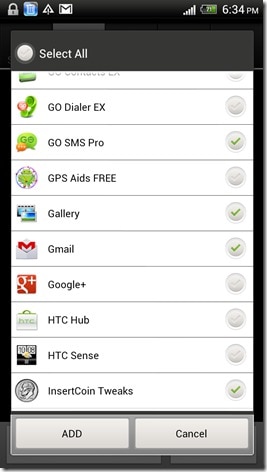
Step 3: The next step is to add apps to the Smart App Protector. Open the Running Tab on Smart Protector and tap on the “Add” button.

Step 3: Next, select the apps you would like to protect from the pop up list. Tap on the “Add” button once you have chosen your Apps.
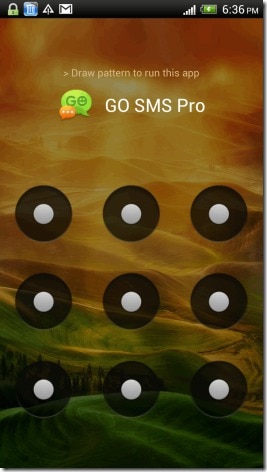
Step 4: Now close the app and the Apps chosen will now be password protected.
Method 2: Using Hexlock
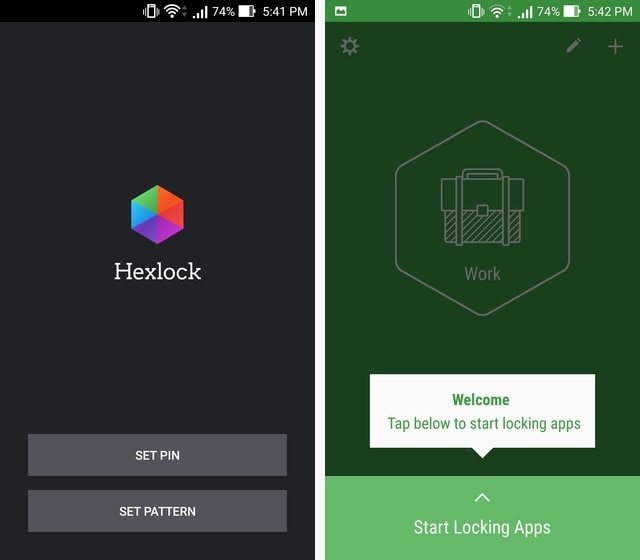
Step 1: Download Hexlock from the Google Play Store. Once it is installed, open it. You will be required to enter a pattern or PIN. This is the lock code that you will use every time you open the app.

Step 2: Once the PIN or Password is set, you are now ready to lock apps. You can create multiple lists of Apps to be locked ba_x_sed on your different needs. As an example, we have chosen the Work panel. Tap on “Start Locking Apps” to start.
Step 3: You will see a list of Apps to choose from. Choose the Apps you wish to lock and then Tap the down arrow in the upper left when you are done.

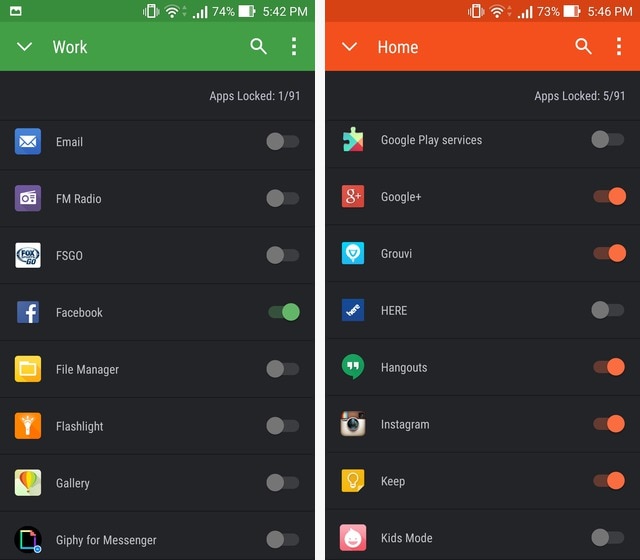
You can then Swipe to the left to move to other lists such as “Home” and proceed to lock apps in this group as well.
Part 3. 6 Private Apps that you should lock on your Android
There are certain apps that may require to be locked more than others. Of course the choice of which apps you should lock will depend on your own uses and preferences. The following are some of the apps you would like to lock for one reason or another.
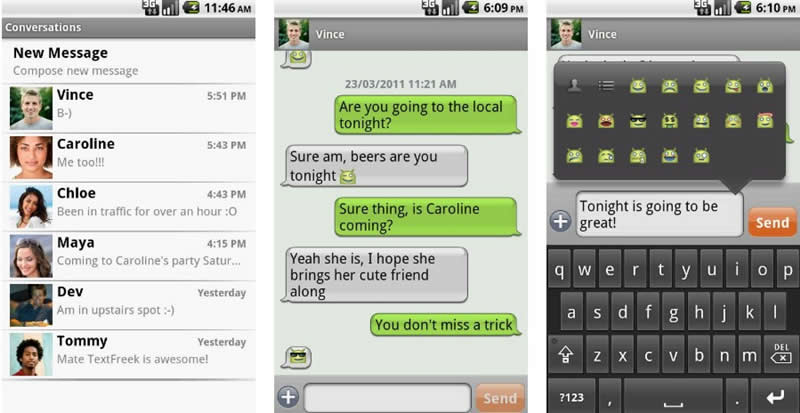
1. The Messaging App
This is the application that allows you to send and receive messages. You may want to lock this app if you use your device to send messages of a sensitive nature that you would rather keep private. You may also want to lock this app if your device is used by more than one person and you don’t want other users reading your messages.
2. Email App
Most people use individual email applications such as Yahoo Mail App or Gmail. This is another critical one if you are going to protect your work emails. You may want to lock the email app if your work emails are sensitive in nature and contain information that is not for all individuals.
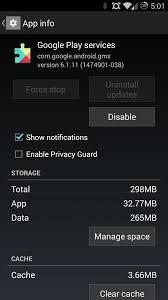
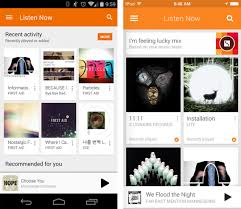
3. Google Play Services
This is the application that allows you to download and install applications to your device. You may want to lock this one if you are trying to prevent other users from downloading and installing further apps to your device. This is especially valuable if your device is utilized by children.
4. Gallery App
The Gallery app displays all the images on your device. The main reason you may want to lock the Gallery app may be because you have sensitive images that are not suitable for all viewers. Again this is ideal if children make use of your device and you have images that you would rather they didn’t see.
5. Music Pla_x_yer App
This is the Application that you use to play the music on your device. You may want to lock it if you don’t want anyone else making changes to your saved audio files and playlists or don’t want someone listening to your audio files.
6. File Manager App
This is the App that displays all of the files that are saved on your device. It is the ultimate app to lock if you have sensitive information on your device that you would rather not share. Locking this app will ensure that all of the files on your device will remain safe from prying eyes.

Having the ability to lock your Apps is an easy way to keep information out of the limelight. It also allows you to take full control of your device. Try it, it might just be freeing as opposed to locking your entire device.
Rootjunky APK To Bypass Google FRP Lock For Vivo Y100A
Factory Reset Protection (FRP) is a security feature built into Android devices running Android 5.1 Lollipop and later versions. It prevents someone from using your phone after a factory data reset without Google account login credentials. The FRP makes it much less attractive for thieves to steal Android phones, knowing they will need help to access them.
FRP automatically activates when you add a Google account to your Android phone. It links the Vivo Y100A device to your account, making it the “trusted owner.” Once activated, FRP becomes embedded in the phone’s system.
While Google FRP is a valuable security feature, it’s vital to acknowledge that there are legitimate situations where bypassing it might be necessary. These instances include forgotten Google account credentials, buying a second-hand device, and device issues. In these cases, tools like RootJunky can help you bypass FRP Lock. We’ll explore how to use RootJunky APK later, but first, let’s define what it is and its role in FRP bypass.

The RootJunky APK is a free Android application also called RootJunky SDL or RootJunky FRP Bypass tool. This app’s primary function is to bypass the Google Account FRP lock on Samsung devices. Rootjunky uses the weaknesses in Android’s setup process to create a new user account or switch existing ones, letting you bypass the FRP and regain control of your phone.
You can complete this process using the app by connecting your phone to a computer through an OTG cable. RootJunky can be helpfu l if you’ve forgotten your Google account password or bought a second-hand phone locked to someone else’s account. However, only use it if you have legitimate reasons to bypass FRP lock, like accessing your device after forgetting your Google account details.
Downloading the RootJunky FRP bypass tool from unofficial sources can introduce malware risks, so stick to trusted sources like the official website. Additionally, when exploring RootJunky, it is vital to keep the following in mind:
- Not all Android devices are susceptible to the methods used by RootJunky. It is necessary to check compatibility with your specific device model and Android version.
- Using FRP bypass tools like RootJunkycan potentially compromise the security of your device. Be cautious and proceed if you fully understand the risks involved.
- Bypassing FRP may involve data loss.
- Download RootJunky FRP bypass APK from a reliable source to minimize the risk of malware or viruses. You can check the APK file from official websites or trusted forums.
- Google constantly updates its security measures, so these tools may not always work effectively.

Part 2: How To Use RootJunky To Bypass Google FRP?
Here are the general steps to use the FRP Bypass APK RootJunky app to bypass Google FRP lock. But remember that specific steps may vary depending on your device and Android version:
- Step 1: On your computer, download the Rootjunky RealTerm program from the official Rootjunky website.

- Step 2: On your phone, download the Rootjunky APK (com.rootjunky.frpbypass-1.0.apk) file from the official website or other reputable sites.

- Step 3: Go to Settings > Security and tap Install unknown apps. Then, enable unknown sources to allow installation of apps from outside the Play Store. Connect your device to a Wi-Fi network.


- Step 4: On your Android phone, open a file explorer app and install the downloaded RootJunky APK file.
- Step 5: Connect your smartphone to your computer using a USB cable.
- Step 6: Launch the Rootjunky RealTerm program on your computer. Under the Display tab, check the Half Duplex option.
- Step 7: On your computer, go to Device Manager > Modems. Locate your device’s port name (e.g., COM3).
- Step 8: On the RealTerm program, enter the correct port number under the Ports tab, then click Change.
Step 9: Click Send to establish a connection. Enter the two commands:
at + creg? \ r \ n
atd1234; \ r \ n
Step 10: Once connected, the Rootjunky APK on your phone will provide on-screen instructions to bypass FRP.
Step 11: If prompted, perform a factory data reset of your device.
While RootJunky offers a free method for FRP bypass, it can be incompatible with your device’s brand, requiring technical knowledge, tedious, and potentially risky. If you are looking for a simpler, safer, and more user-friendly solution, Wondershare Dr.Fone might be a better fit for you. If you want to learn how to use this tool to bypass FRP lock with minimal technical expertise, then keep reading.
Part 3: Easier Tool Than RootJunky APK To Bypass Google FRP
Google FRP adds an extra layer of security after a device reset. However, regaining access to the smartphone can be challenging if you forget your Google account details, forget your lock screen, or just buy a used device. While methods like the FRP RootJunky app exist, using it can be complex or risky.
Consider exploring third-party options like Dr.Fone for a potentially easier and safer FRP bypass solution. Dr.Fone Screen Unlock tool helps remove the Android FRP lock without requiring a PIN or Google Account.
Why Use Dr.Fone - Screen Unlock?
Here are some of the key features of Dr.Fone - Screen Unlock:
- **User-friendly:**Fone boasts an intuitive interface, eliminating the need for technical expertise. Even beginners can navigate the process with ease.
- **Widespread Brand Compatibility:**Fone supports mainstream brands, such as Samsung, Xiaomi, Oppo, Redmi, Realme, and Vivo, catering to a broader user base.
- **Fast and Efficient:**Regain access to your device in minutes without wasting time on tedious procedures.
Step-by-step Guide to Removing FRP Lock With Dr.Fone - Screen Unlock
Ready to leave the hassle of using RootJunky and easily bypass the FRP lock? Download and install Dr.Fone on your computer, then follow these steps to learn how to bypass Google FRP on your device:
- Step 1: Launch Dr.Fone on your computer and connect it to your Android device. Choose Screen Unlock from the Toolbox in the main interface.
- Step 2: Choose Android as your device type. This will take you to the next screen, where you can select Remove Google FRP Lock to proceed.
- Step 3: Select your device’s brand from the list and click Start to continue.

Note:
The next steps may vary depending on the brand you selected.
- Step 4: Select the OS version of your device and click Start to continue.

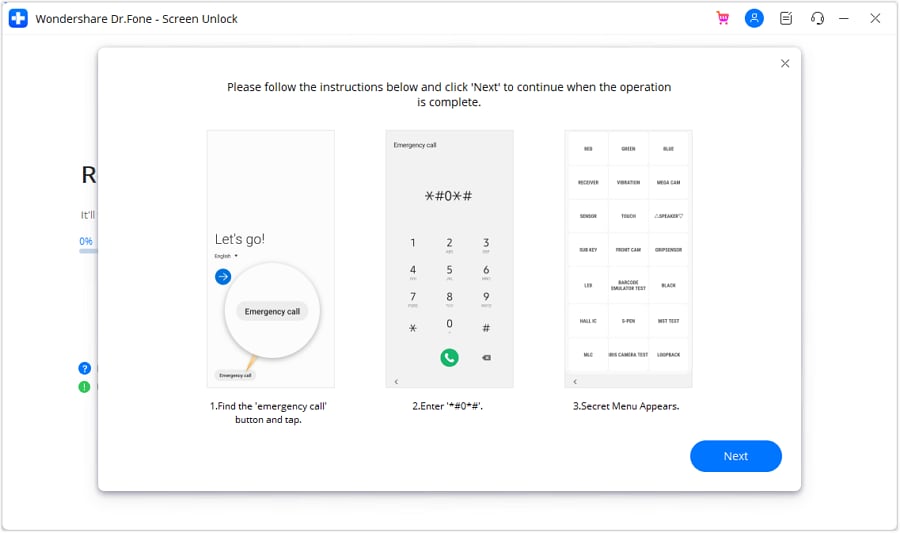
- Step 5: Access the secret menu on your phone using the on-screen instructions, then click Next to proceed to the next step.
- Step 6: When your Samsung prompts you to activate USB debugging, tap Allow. Then, on your computer screen, click Authorized to confirm.
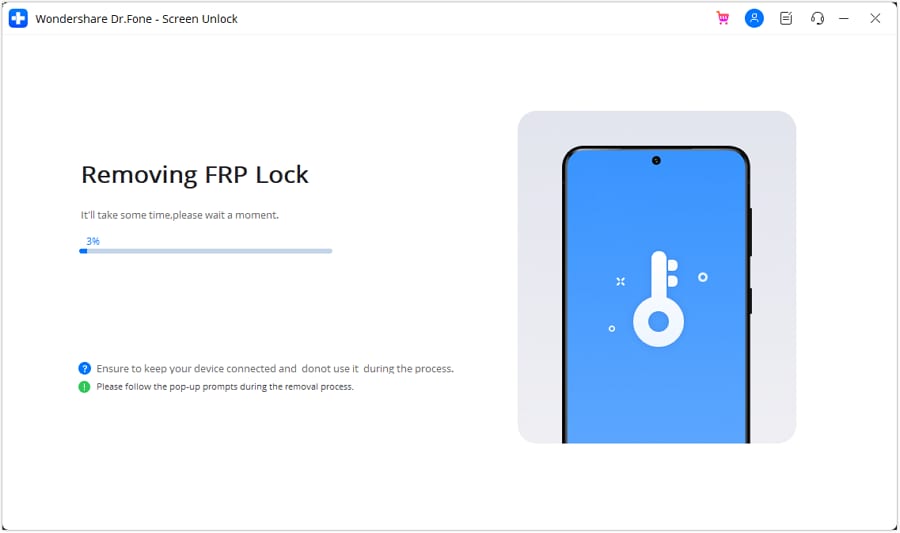
- Step 7: You will see the FRP lock being bypassed on your Android device on the next screen.
- Step 8: Click Done if the FRP lock removal was successful, otherwise, click Try Again to repeat the process.

That’s it! With Dr.Fone Screen Unlock, you can easily bypass Google FRP and regain access to your Android device, leaving the complexities of RootJunky behind.
Tips: Are you searching for a powerful FRP bypass tool? No worries as Dr.Fone is here to help you. Download it and start a seamless unlock experience!
Conclusion
Both RootJunky and Dr.Fone offer options for you to regain control of phones with Google FRP lock. FRP Bypass RootJunky tool excels with its free-to-use approach, perfect for tech-savvy users comfortable with APK installations. While requiring a paid subscription, Dr. Fone provides pre-rooted firmware installations and broader device compatibility, which is ideal for those seeking a more streamlined but supported experience.
The best choice boils down to your personal needs and budget. Remember, FRP bypass should only be utilized by rightful owners facing genuine lockouts. When used responsibly, these tools can help you access your phone after a factory reset even without your Google account credentials. Choose the tool that best fits your needs and proceed with caution. Use these tools responsibly and regain access to your device the right way.
- Title: How to Unlock Vivo Y100A Pattern Lock if Forgotten? 6 Ways
- Author: Peter
- Created at : 2024-07-16 11:14:41
- Updated at : 2024-07-17 11:14:41
- Link: https://android-unlock.techidaily.com/how-to-unlock-vivo-y100a-pattern-lock-if-forgotten-6-ways-by-drfone-android/
- License: This work is licensed under CC BY-NC-SA 4.0.