
:max_bytes(150000):strip_icc():format(webp)/Robothandholdinganapple-fbe6ff482ed641e188dd6650b9ac132e.jpg)
Full Tutorial to Bypass Your Vivo X100 Face Lock?
Full Tutorial to Bypass Your Vivo X100 Face Lock?
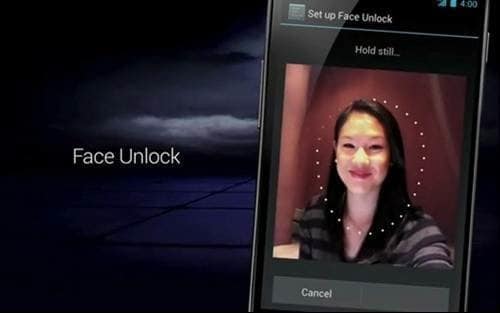
Your android phone face unlock may be buggy, or the camera may be damaged. It can’t recognize your face. When you try multiple times in such cases, it will lock your device permanently. Are you stuck with a locked phone? And you’re still confused about what just happened. Face unlock may face problems such as
- Face unlock app may be buggy
- Your face unlock settings may be unstable
- Your phone camera or face unlock sensor may be damaged
- Someone else may have registered their face without your permission
Whatever the reason, they are equally big obstacles for you to use your phone as usual; trying to unlock your device can lead to a permanently locked phone. So how do you bypass face unlock?
Follow the guide below to bypass the face unlock settings and choose the best one for yourself.
How To Bypass Android Face Lock by Ourselves?
If you want to bypass face lock by yourself, then different methods can help you. These are all tested and work well.
1. A Picture Possibly Bypasses Face Lock
You can use your photo to manipulate the face lock app. Simply use your photo to unlock the phone, which should work fine. If your phone doesn’t recognize your face from a photo, try again.
If it still doesn’t recognize your face, try a different photo or even change the camera’s lighting settings or the angles to see if that helps.
Anyway, this method is still unstable because of many uncontrollable factors. If everything fails, consider the following methods to bypass the face lock.
2. Hard Reset your phone
To get around the Android lock screen, perform a factory reset. While resetting your phone allows you to set a new password, it also erases all data from your device. This method works like a charm, but it also requires more technical knowledge. To bypass screen lock via factory reset, follow these steps.
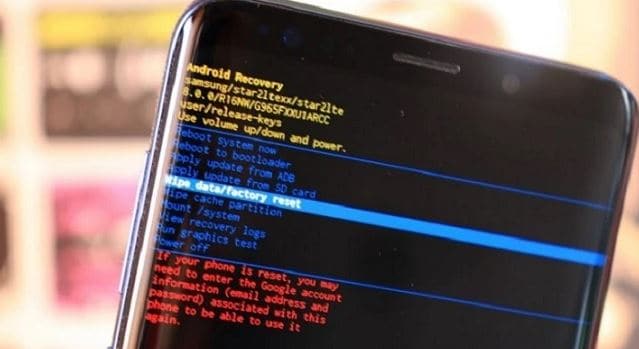
Step 1: Turn off your phone and hold the Power and Volume-down buttons simultaneously until the recovery mode screen appears. There are minor variations depending on the brand and model.
Step 2: Select the Wipe data/Factory Reset option using the volume buttons. To confirm the option, press the Power button.
Step 3: Choose Yes > Delete All User Data, then press the power button to continue. When the process is complete, turn on your phone.
So, before facing such awkward cases, like data loss, we suggest you have a backup habit of keeping your data safe.
3. Google Find My Device
Google Find My Device is a service that lets you remotely lock, track, and wipe data from stolen or lost phones. With a Google account and the password, it won’t be complicated to remove any locks on your phone. You can bypass the Android lock screen by following the steps below:
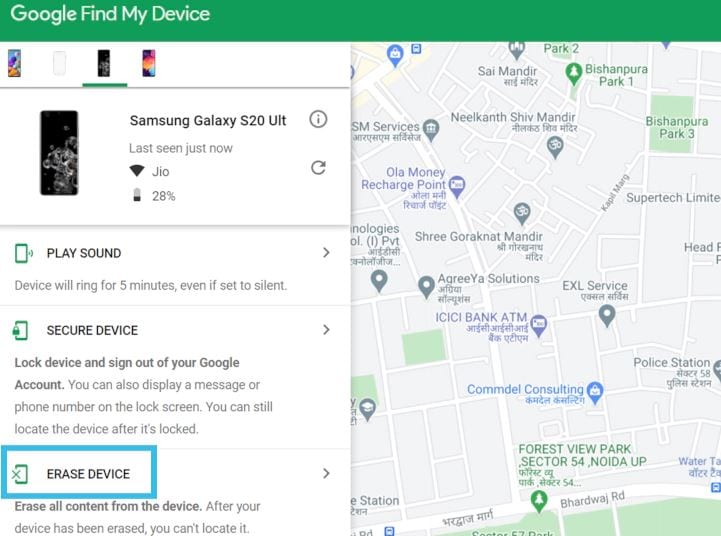
Step 1: Navigate to Find My Device and sign in with your Google account.
Step 2: Your phone receives a notification.
Step 3: Select Erase Device, confirm, and click Erase as a warning pops up on the screen.
Step 4: The factory reset process on your phone begins. When it’s finished, choose My Google Account instead of using your phone as if it were brand new.
Just like the hard reset, after using Google Find My Device, all your data and settings will be erased. Please make everything well prepared before you decide to unlock your device.
Easiest Way to Unlock Your Android Face Recognition Using Dr.Fone-Screen unlock
The methods mentioned above may be hard for you, and you don’t know any technical skills. If you are looking for an easy tool that can face unlocking for you, then Dr.Fone - Screen Unlock is all you need.
Dr.Fone by Wondershare has many useful tools, and Screen Unlock is one of them. It is the easiest and safest method to bypass the Android face lock. It is safe, secure, and easy to use.
The following guide explains how to use Dr.Fone-Screen unlock to bypass the Android face lock.
Step 1: Install and open Dr.Fone on your computer
Step 2: Run Dr.Fone on your PC and select “Screen Unlock” from the tools

Step 3: Select Unlock Android Screen
Please select” Unlock Android Screen” for the rest process.

Step 4: Select device model
Please click the button fitting your phone.

When arriving at this page, we have a lot of options to unlock your device screen for most phone brands, like Samsung, Nokia, LG, OPPO, etc.

Step 5: Enter into Recovery Mode
Here are examples of Samsung phones via its Recovery Mode to unlock your Android device screen.
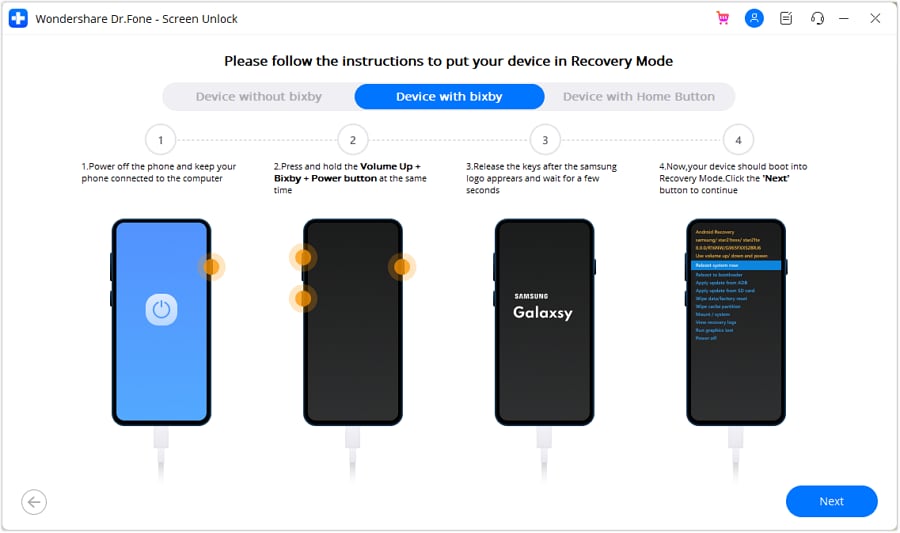
(Recovery Mode When the Samsung phone with Bixby)

(Recovery Mode When the Samsung phone without Bixby)
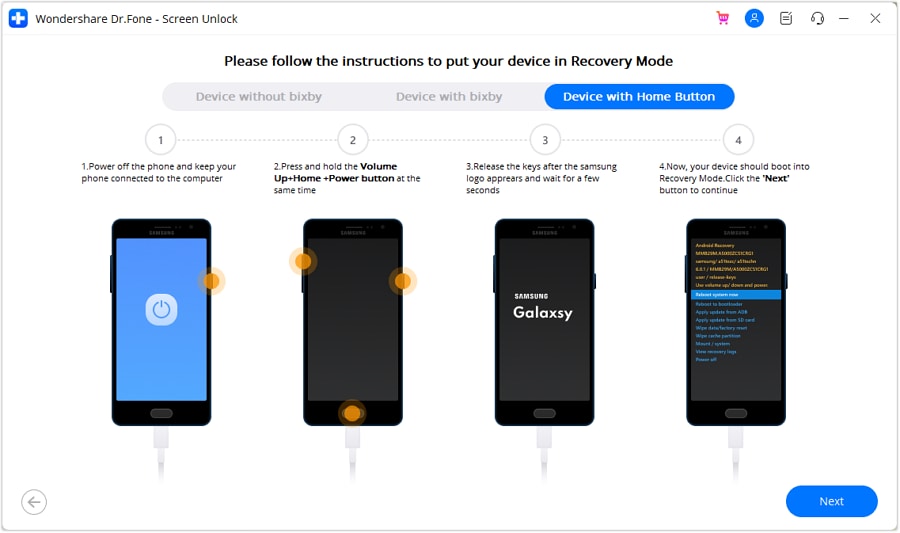
(Recovery Mode When the Samsung phone with Home button)
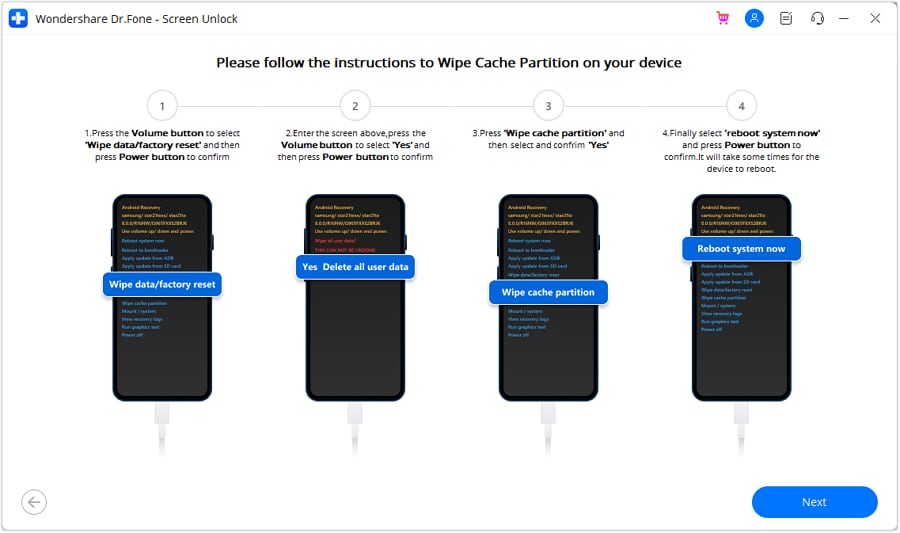
Step 6: Instructions to Wipe Cache Partition
This step in Recovery Mode is the most important to unlock your screen. Please click the buttons as instruction.
Now you can see your device is unlocked successfully

Conclusion
There are various methods to bypass Android face lock, but Dr.Fone-Screen Unlock is the easiest and safest method. Dr.Fone offers Screen Unlock and many other handy tools to help you recover, remove and unlock your Android phone without geeky knowledge. Dr.Fone-Screen Unlock is a step-by-step process, and you do not need to do anything; Dr.Fone will do all you want to do on your phone!
How To Track IMEI Number Of Vivo X100 Through Google Earth?
When losing your phone, having a reliable tool at your fingertips can make all the difference. That tool is IMEI tracking, your secret weapon for locating your lost or stolen device. IMEI is a unique number that every mobile device possesses. It’s like a fingerprint for your phone.
Now, the question is, is it possible to track an IMEI number through Google Earth? This question has sparked much debate on the internet, so this article aims to find it out. Keep reading and learn the secrets of Google Earth IMEI trackers.
Part 1: How To Track Your Vivo X100 on Google Earth
This Google Maps IMEI number tracking issue has caused quite a buzz and controversy on the internet. It has raised many concerns regarding the safety and privacy of every smartphone user. To tell you the truth, Google Earth lacks IMEI location data and does not provide such capabilities. Thus, there is no truth in tracking IMEI numbers through Google Earth.
However, if you have access to a cell phone’s GPS coordinates or the location of a cell tower to which it is linked, you can use Google Earth to follow its location.
How To Locate a Smartphone Using Google Earth
Many current smartphones include GPS receivers that allow them to pinpoint their exact location. If you know the phone’s GPS coordinates, you can plug them into Google Earth to see where it is on the map.
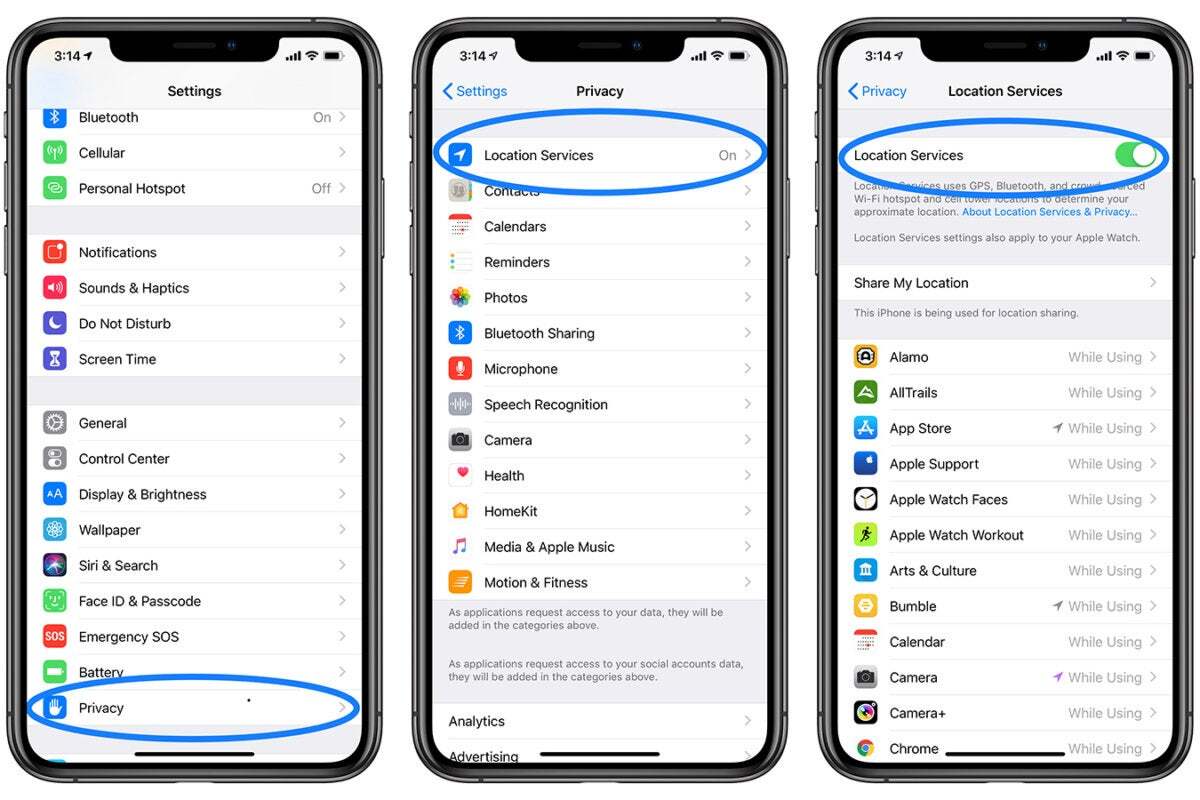
- Step 1: This process won’t be possible if your location services are not enabled on your phone. To do this, navigate to Settings, then Location on Android, and Settings > Privacy > Location Services on iOS.
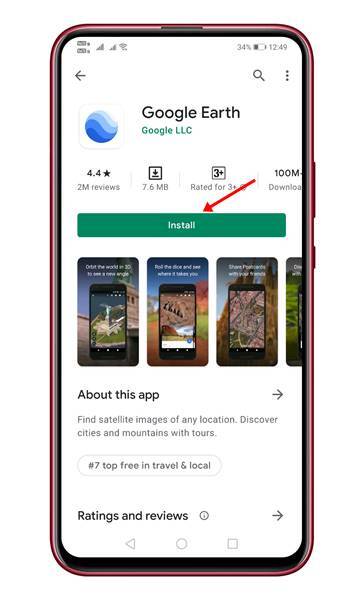
- Step 2: Google Earth can be downloaded and installed on your computer or mobile device. It works with Windows, macOS, Android, and iOS. Download it from your device’s Google Earth website or the app store.
- Step 3: Sign in to Google Earth using the Google Account linked to the phone you want to track. This step is required to acquire location data and monitor IMEI numbers using Google Earth.
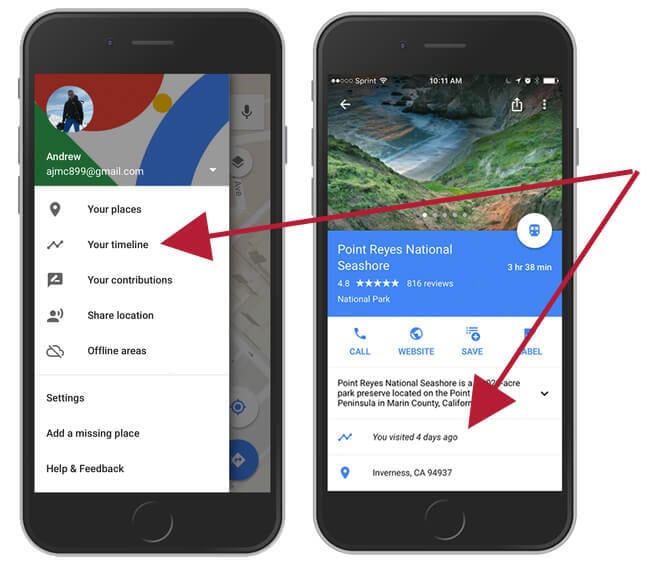
- Step 4: Launch Google Earth on your computer or mobile device, then select Your timeline from the Google Maps menu. The operation will take you to the Google Maps Timeline page.
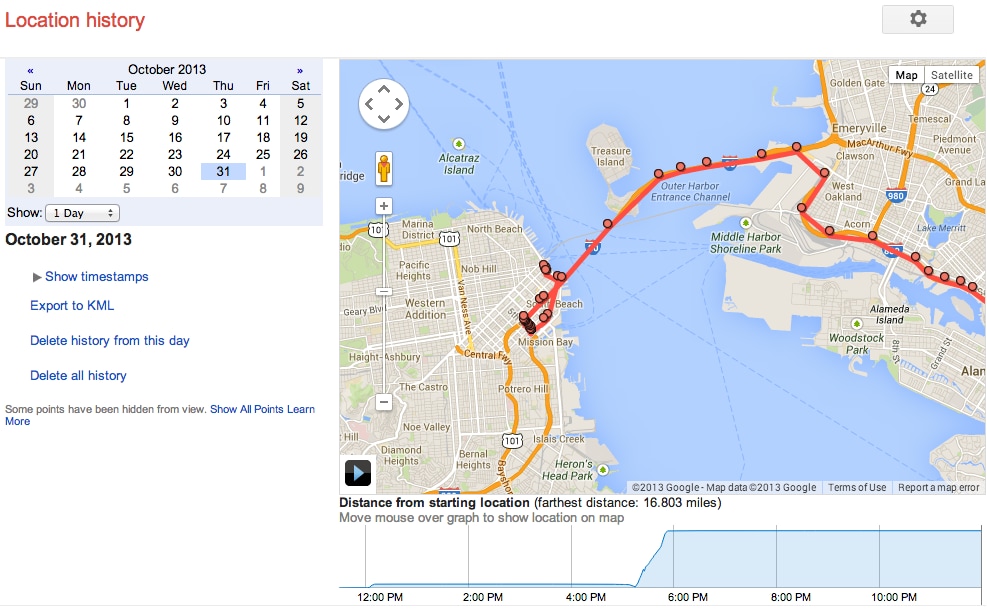
- Step 5: Select the day you wish to see the phone’s location history. Choose the Vivo X100 device you want to track from the dropdown menu if you have numerous devices linked to the same account. The timeline displays the selected device’s location history for the set date. Examine the locations visited, the routes taken, and the time spent at each spot. For further information, select a certain location or time.
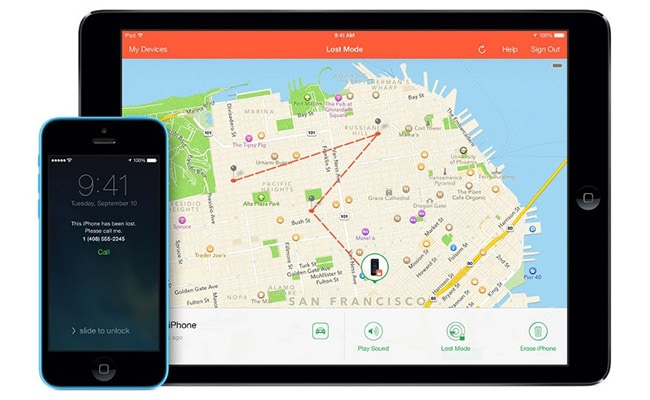
Note: Google Earth does not support real-time location tracking by default. You can use the Find My Device function on Android or Find My on iOS instead if you want to track your phone’s real-time location.
Part 2: Google Earth Alternatives: Track Phone Using IMEI Number
Now that you know the truth behind tracking an IMEI number through Google Earth, let’s talk about other ways to track your phone using your IMEI number. This section will discuss some of your other options when it comes to IMEI number location tracking.
Method 1: Using a Third-Party App
If you have the IMEI number of the stolen device, you can track the phone using IMEI for free utilizing various tools available online.
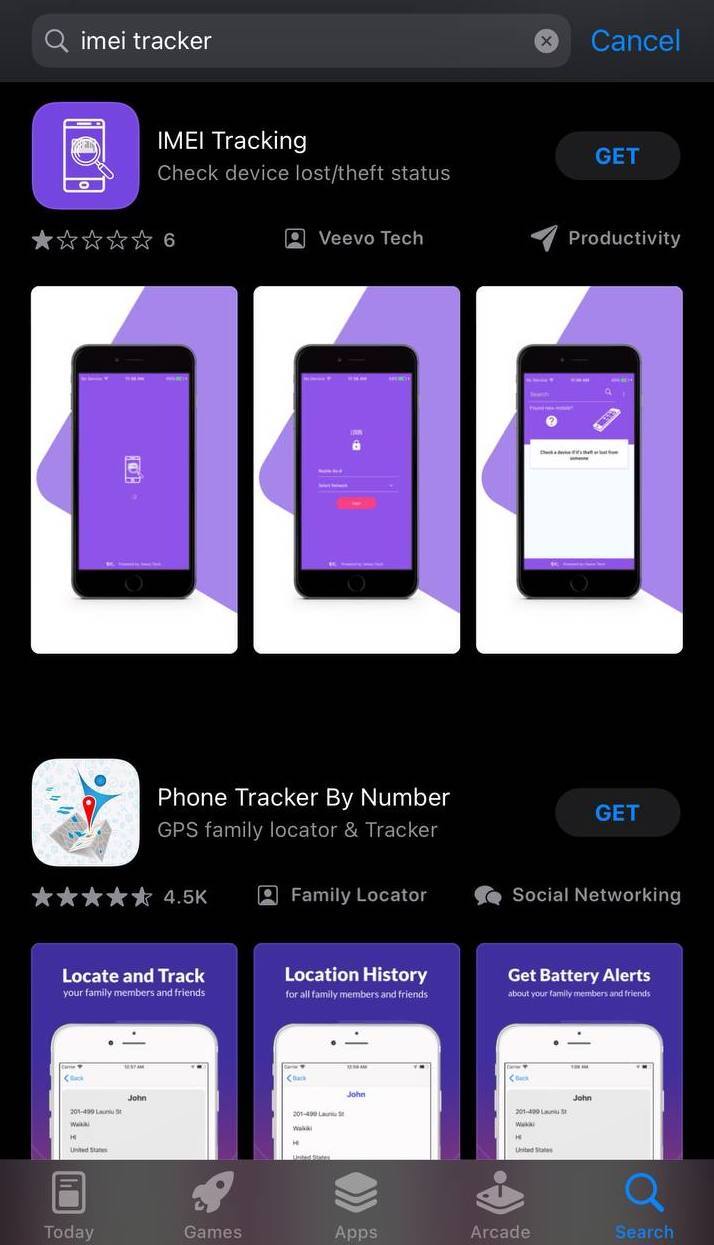
- Step 1: In the app store, search for “IMEI tracker” and download the IMEI tracking app you wish to install on your phone.
- Step 2: Open the app and follow the in-app guide on how to use it.
Note: Most of the apps require authorization access to your phone. Some also provide a feature where you may send an SMS or a command to get the lost phone’s location.
Method 2: Online IMEI Tracking
In certain situations, an online platform is preferable to a mobile app. For your convenience, a free online platform for tracking a phone using its IMEI number is featured below:
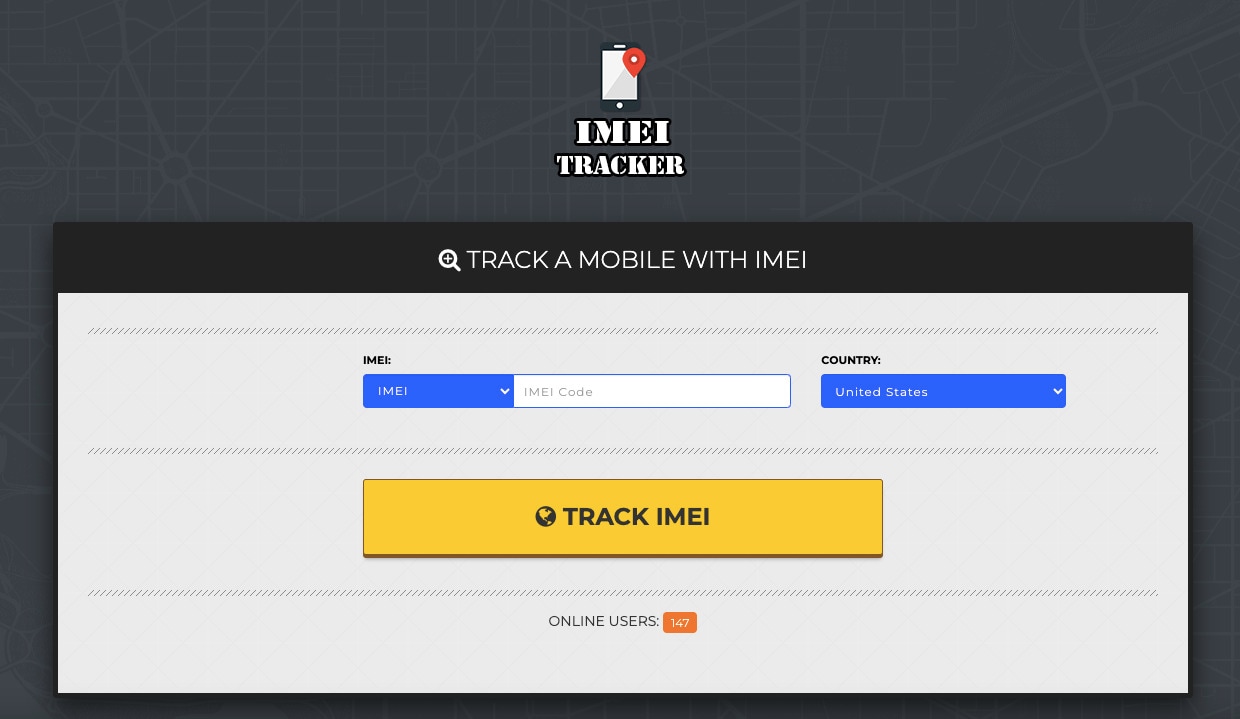
IMEI TRACKER
The online IMEI TRACKER is simple to use. After searching an IMEI tracker in Google and opening its website, please enter a valid IMEI code in its search bar and specify the country where your cell phone was first registered. After that, you have to wait for a few moments, and then you may view the phone’s location status and determine whether it is lost or stolen.
Pros and Cons of IMEI Trackers: Apps and Online Platforms
Now that you know there are still methods to track a phone using an IMEI number, it’s also important to weigh their pros and cons. See the list presented below:
Pros
Check out the advantages of using IMEI trackers below:
- **Lost or Stolen Device Recovery.**The primary benefit of an IMEI tracker is its ability to help locate a lost or stolen mobile device. That can be crucial for recovering your valuable device.
- **No Need for Special Apps.**Unlike many other tracking methods, IMEI tracking doesn’t require any special apps or software to be installed on the Vivo X100 device you want to track. It relies on the unique IMEI number of the Vivo X100 device.
- IMEI Tracker is compatible with many mobile devices, including smartphones and feature phones. It’s not limited to a specific operating system or brand.
Cons
Below are the drawbacks of using IMEI trackers:
- **Privacy Concerns.**IMEI tracking can raise privacy concerns, as it involves tracking the location of a mobile device. It’s essential to use this technology responsibly and only for legitimate purposes.
- **Internet and Network Dependency.**IMEI tracking depends on the Vivo X100 device being connected to the internet or a mobile network. If the Vivo X100 device is turned off, in airplane mode, or disconnected, tracking may be impossible.
- **Inaccuracies in Remote Areas.**IMEI tracking can be less accurate or even unavailable in remote or rural areas with poor network coverage.
In summary, an IMEI tracker can be a valuable tool for locating lost or stolen mobile devices with its location accuracy and compatibility with various devices. However, it comes with limitations related to privacy and network dependency.
Bonus: An Effective Method for Other iPhone Issues Like Locked Screens
In the previous sections, this article delved into IMEI tracking, which helps you accurately locate your lost or stolen phone. However, imagine this scenario: you’ve found your long-lost iPhone, but there’s a problem. You can’t remember the password, PIN, or pattern to unlock it. So this time, let’s go over one of the most common issues smartphone owners encounter: being locked out of their devices.
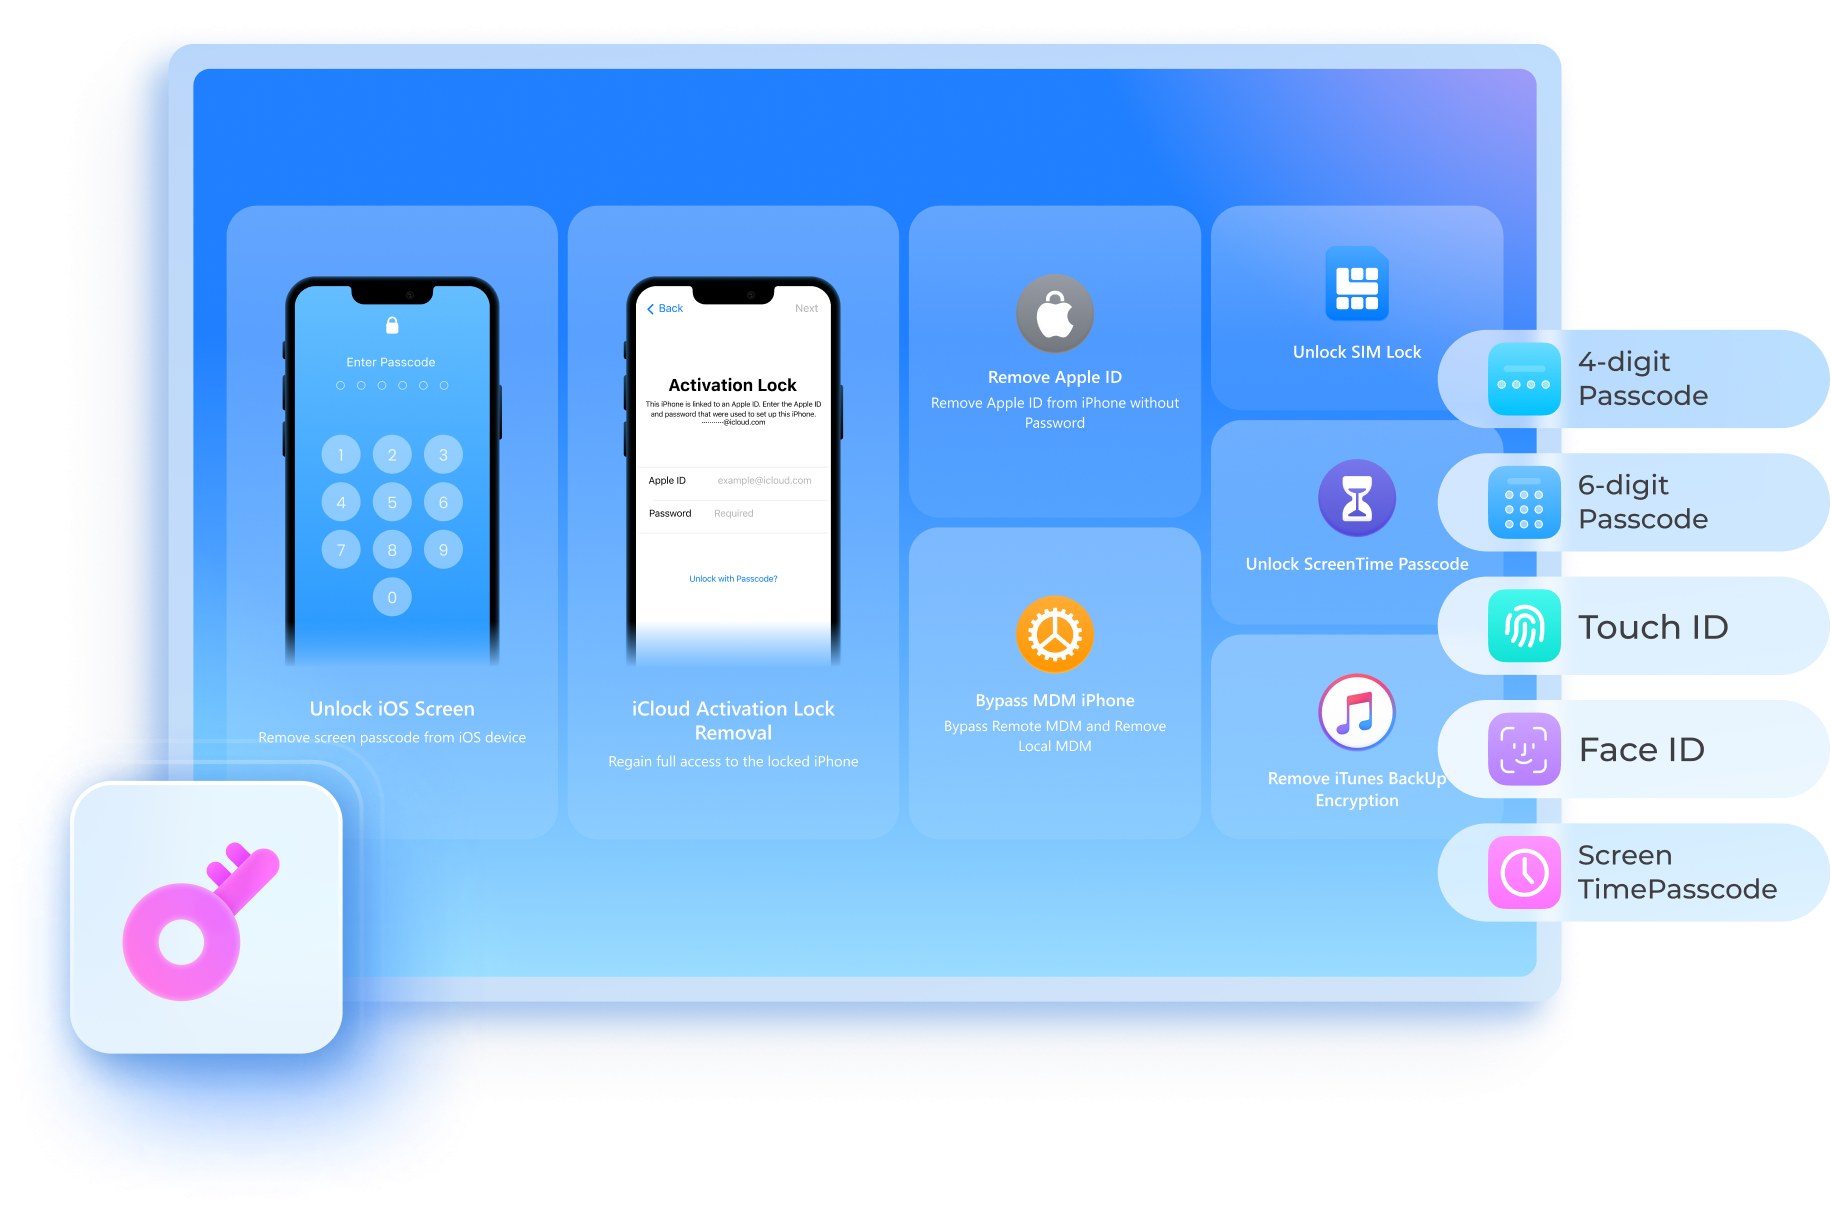
Introducing Wondershare Dr.Fone – Screen Unlock (iOS): Your iPhone Savior
There are numerous scenarios where one may forget the passcode on their iOS device. While many people dismiss their phones as useless, there are ways to unlock iPhones correctly. And that’s where Dr.Fone - Screen Unlock (iOS) comes to the rescue. It’s like the locksmith for your phone’s digital lock.
Why Dr.Fone - Screen Unlock Is Your Go-To Solution
Let’s discuss why Dr.Fone - Screen Unlock is a game-changer in unlocking phone, especially when using your IMEI number.
- **User-Friendly Interface.**Fone - Screen Unlock boasts an interface designed with you in mind. You don’t need to be a tech guru to use it. The steps are straightforward, making the whole process hassle-free.
- **Wide Compatibility.**One of the best things about Dr.Fone - Screen Unlock is its compatibility with various mobile devices. It doesn’t matter if you’re using an Android or iOS device; this tool has you covered. It’s like having a universal key to open many locks.
- **Safe and Secure.**Security is a top priority when it comes to your phone. Dr.Fone - Screen Unlock ensures that your data remains safe during unlocking. Your personal information won’t be compromised.
Step-by-Step Guide
Now, let’s dive into how to use Dr.Fone - Screen Unlock to unlock your phone easily :
- Step 1: After downloading and installing Wondershare Dr.Fone on your PC, click Toolbox, click Screen Unlock, then choose iOS. In the window that appears, click the Unlock iOS Screen button.

- Step 2: On the next screen, select Start to begin the unlocking procedure for the iOS device. Make sure that your device’s battery levels are enough.
- Step 3: After that, you should set your iDevice into Recovery Mode. Follow the on-screen instructions to put your iDevice into the appropriate mode for your model. If Recovery Mode does not work, click the Try DFU Mode button at the bottom to access the instructions for entering the iDevice into DFU mode.

- Step 4: After the user successfully enters their iDevice into Recovery Mode, the platform automatically recognizes the Device Model and shows it in the appropriate section. Modify the model and select the System Version to meet your needs if necessary. After that, select Start to begin unlocking your device’s screen.

- Step 5: The following screen reveals the status of the iOS firmware download on the platform. If you want to stop the procedure, click the Stop button. In cases when the iOS firmware is downloading slowly on the platform, utilize the Copy button to copy the URL for manually downloading the iOS firmware.
- Step 6: After successfully downloading the iOS firmware, it is confirmed and displayed on the next screen. Continue by clicking the Unlock Now button to begin the unlocking procedure.
- Step 7: A prompt window displays on the screen, asking for procedure confirmation. Enter the indicated code and tap Unlock to proceed with the final result.

- Step 8: The next screen displays the unlocking iOS device’s progress bar. Keep in mind that the Vivo X100 device must be connected at all times; otherwise, it will brick.
- Step 9: Once the iDevice has been successfully unlocked, click the Done button to complete the process. If your iDevice is still locked, click Try Again to restart the process.
Conclusion
This article explored the incredible world of IMEI tracking, a powerful tool for locating lost or stolen phones. You’ve learned that your IMEI number is capable of helping you pinpoint your device’s location, but tracking IMEI numbers through Google Earth is impossible.
But that’s not all. This article also introduced and divulged an amazing and reliable tool for unlocking an iPhone. So, the next time you’re in a tight spot with a locked screen, remember that Dr.Fone - Screen Unlock (iOS) is the best software you should get your hands on.
Unlock Vivo X100 Phone Password Without Factory Reset: Full Guide Here
In today’s fast-paced digital age, our smartphones are more than just communication devices; they are repositories of our personal and professional lives. However, there comes a time when we find ourselves locked out of our Vivo X100 phones , desperately trying to remember a password or PIN that seems to have slipped our minds. The thought of a factory reset, which wipes our valuable data clean, can be daunting.
But fear not! This comprehensive guide is here to rescue you from the perils of forgotten passwords without factory reset. So, if you’re in a bind and need to regain access to your device, read on for a full guide to know how to unlock Vivo X100 phone password without factory reset!
Method 1: Unlock Vivo X100 Phones Running Older Android OS (4.4 Or Below) With Google Security Questions
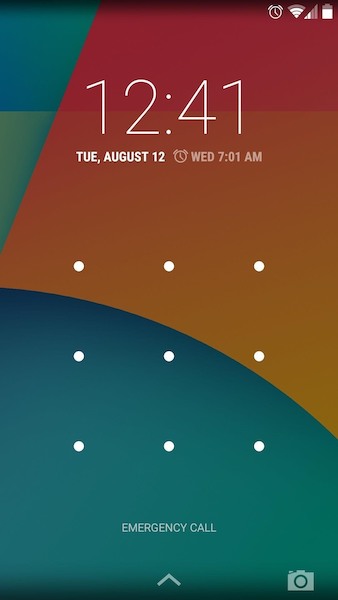
Up until Android version 4.4, you could lock your phone screen with a pattern. Google allowed you to unlock the phone by answering security questions in case you forgot the pattern. Since these may also be easily guessed by people who are in possession of your device illegally, Google deprecated this method after Android 4.4. However, the phones running Android 4.4 or lower are still allowed to be unlocked using this method. So, if you have an old Vivo X100 with Android 4.4 or earlier, here is how to unlock Vivo X100 phone password without factory reset:
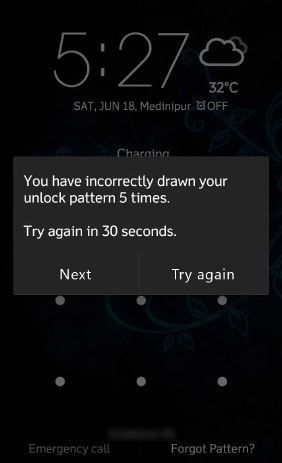
Step 1: You may already have entered the incorrect pattern a few times. If so, simply tap the Forgot Pattern to start the process of unlocking your Vivo X100 phone screen. Else, deliberately enter incorrect pattern a few times till you see the Forgot Pattern option:
Step 2: Next, choose the option to reset the pattern by answering your Google credentials.
Step 3: Sign into the Google account that matches with the Google account on the phone.
Step 4: Lastly, create a new pattern to unlock your Vivo X100 phone.
Side Tip
Now that you have unlocked your Vivo X100 phone with Google security questions, we have a tip for you. For the safety and security of your data on your phone, it might be time to trade in the Vivo X100 device for a newer phone with the latest Android OS. Between Android 4.4 and the Android 12 prevalent today, there have been massive security updates and code improvements that you can benefit from. It makes sense given that our phones hold a substantially large part of our personal and professional lives these days. And we are not even talking about features that you may or may not need - we are talking only from a data security point of view. Of course, you will also benefit from the massive performance improvements that have taken place thanks to hardware and software improvements over the years.
Method 2: Unlock Your Vivo X100 Phone Using Wondershare Dr.Fone ( Easy & Fast)
Now, since the previous method of unlocking your Vivo X100 phone was deprecated after Android 4.4, what about the phones running newer versions? How to unlock a Vivo X100 phone with a newer Android version? There are still a few methods that are available to you, but the best way to unlock a Vivo X100 phone is to use this nifty little app called Wondershare Dr.Fone. And you will discover that there is nothing little about this app!
Dr.Fone is a collection of several modules unified in a single interface. Each of these modules is designed meticulously to serve a purpose for your device, such as unlocking your phone, repairing your phone, erasing data from your phone or wiping the phone securely, etc. With this approach, users are never encumbered with options. Instead, they can focus on every task in the simplest, easiest manner without worrying about doing something untoward because they could not understand the software. Dr.Fone is fast, intuitive and easy to use.
Step 1: Launch Dr.Fone on your computer. Select the Screen Unlock module.

Step 2: Click Unlock Android Screen.
Step 3: Select the first option – 100% Remove Screen Lock as Vivo X100 devices cannot be unlocked without data loss.
Step 4: Choose your phone brand carefully – Vivo X100 in this case.

Step 5: Complete the instructions to download the software to your phone.
Step 6: The software will start downloading, and if everything went smoothly you will see a screen to click Remove Now.
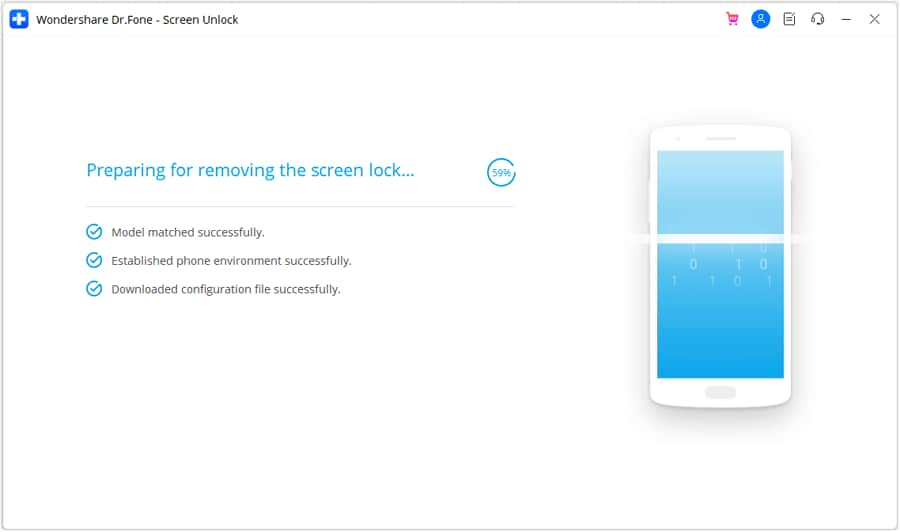
Step 7: When all is done, you will see the following:

Your Vivo X100 phone screen is now unlocked. Click the button below to unlock Vivo X100 phone password without factory reset now!
Method 3: Factory Reset Vivo X100 Phones (Wipes User Data)
There is a standard factory reset built into every Vivo X100 phone to allow users to erase the Vivo X100 device and start over fully. This option wipes all user data and resets the phone to how you received it in the box. Naturally, this is not a preferred way, as it requires the phone to be set up all over again and that takes time. Also, all data will need to be backed up beforehand in order to restore it again. Overall, this method consumes a lot of time.
Step 1: Go to Settings > Backup & Reset.
Step 2: Tap Factory Reset > Reset Phone.
Step 3: Tap Erase Everything.
Method 4: Use Google Find My Device To Unlock Vivo X100 Phones (Wipes User Data)
Google Find My Device is an online service by Google that is used to locate and track your Android devices. It works like how Apple’s Find My works for its range of hardware. Using Find My Device, you can play a sound on the Vivo X100 device to locate it in the house if you have misplaced it, lock the phone in case it is lost, and wipe the Vivo X100 device remotely.
Step 1: Go to https://accounts.google.com .
Step 2: Log in and go to Security > Your Devices:
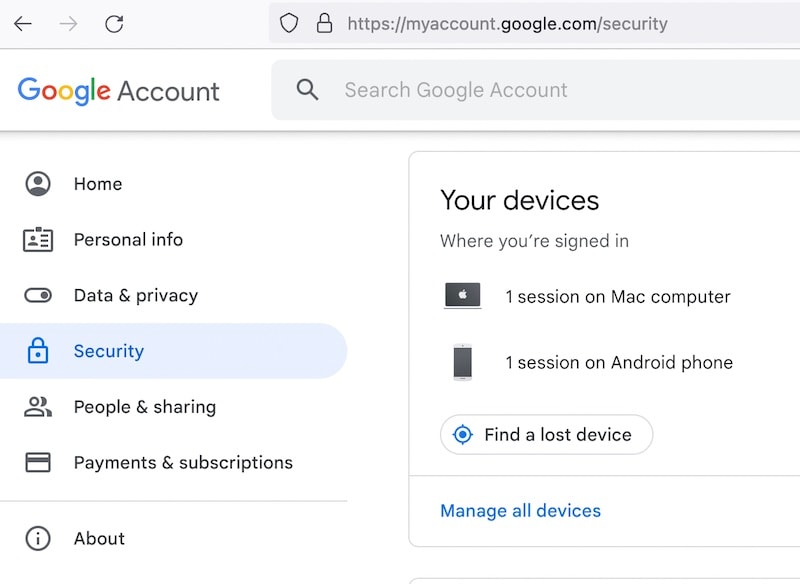
Step 3: Click Find A Lost Device.
Step 4: Select the Android device you want to wipe carefully if you have a few:
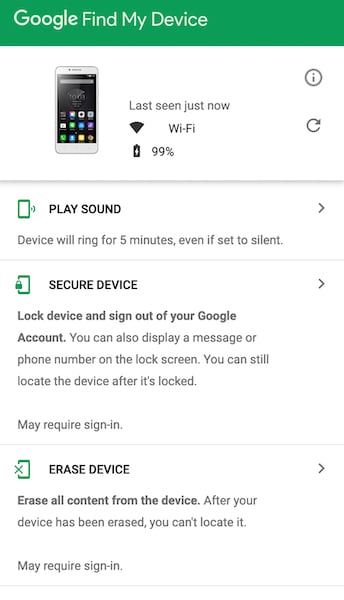
Step 5: Click Erase Device and confirm.
Step 6: After the erasure, your device will need to be set up all over again.
Method 5: Request Service Provider To Unlock Your Vivo X100 Phone
If your Vivo X100 phone is tied to a service contract and you want to unlock your device to use it with other service providers, this method is for you. You can request your service provider to unlock your Vivo X100 phone provided their conditions are met. Usually, they will be happy to oblige if there are no dues and the service period is over.
Bonus Tip: If You Want To Disable Screen Lock
Sometimes, you may not need to secure your device at all. For example, if you have an old device that you want to use as a media player in your car or to give to children to play games, you may not want to password-protect the Vivo X100 device. This is how to disable screen lock on Android:
Step 1: Navigate to Settings > Security > Screen Lock.
Step 2: Enter the PIN or pattern.
Step 3: Choose None and confirm.
Conclusion
There are a handful of methods you can use to unlock a Vivo X100 phone in case you forget the password or PIN or pattern. Especially for the old pattern-based screen locks, it is easy to unlock the phone if you know the answers to the security questions in your Google account. However, to unlock Vivo X100 phone screen without password on newer Android versions, you need technical knowledge, or you can use third-party software such as Wondershare Dr.Fone. Using Dr.Fone Screen Unlock, you can unlock your phone quickly with no technical mumbo jumbo to confuse you. All you will get is a software that guides you every step of the way so you can unlock Vivo X100 phone easily.
- Title: Full Tutorial to Bypass Your Vivo X100 Face Lock?
- Author: Peter
- Created at : 2024-04-03 14:41:40
- Updated at : 2024-04-05 14:43:12
- Link: https://android-unlock.techidaily.com/full-tutorial-to-bypass-your-vivo-x100-face-lock-by-drfone-android/
- License: This work is licensed under CC BY-NC-SA 4.0.
